Laundry Room Makeover: Incredible Before & After Inspiration
There is a special kind of satisfaction in a good before and after, and few rooms deliver it like the laundry room. It is usually the most neglected corner of the house, short on light, storage and folding space, yet it hosts one of the most repeated jobs in family life. A thoughtful laundry room makeover changes how that job feels. Work moves in a sensible order, supplies live where you reach for them, and clean clothes stop migrating to the sofa.
This guide breaks a full transformation into eleven manageable moves, from honest planning and a unifying color palette to shelving, counters, drying space and the small daily habits that keep the after photo looking like the after. None of it requires a huge room or a contractor on speed dial.
1. The Power of a Laundry Room Transformation

Start by standing in the doorway with your phone and taking honest before photos from every corner. Write down what frustrates you most during a normal wash day. Piles on the floor usually mean missing sorting space, clothes draped over doors mean missing drying space, and detergent clutter means missing storage near the machines. That short list becomes your brief. A transformation works because it solves real friction, not because it copies a picture. Measure the room, the machines and the door swing while you are at it. Every later decision, from shelving depth to counter height, gets easier when the problems and the numbers are written down first.
2. Planning Your Before and After Layout

Good laundry rooms follow a simple path. Dirty clothes come in, get sorted, washed, dried, folded and carried out, ideally in that order and without backtracking. Sketch the room on paper and place each stage along that path. Keep sorting baskets near the door, machines in the middle, and folding and hanging space at the far end if the room allows it. Leave at least a comfortable arm’s reach of clearance in front of the machines so doors open fully and baskets slide past. If you can only move one thing, move storage. Shifting a tall cabinet to the end wall often frees the whole center of the room.
3. Choosing a Cohesive Color Palette

Color is the cheapest transformation tool you own. In a small laundry room, one light color across the walls and any built in cabinetry makes the space feel wider and calmer, because your eye stops reading every box and edge separately. Warm whites, soft sage and dusty blue all bounce light while hiding the scuffs that white gloss shows. Keep the palette to two or three tones and repeat them in baskets, jars and a runner so the room reads as planned. Test paint on the wall beside the machine and check it in the evening under your actual lighting before committing to the whole room.
4. Maximizing Vertical Storage with Open Shelving

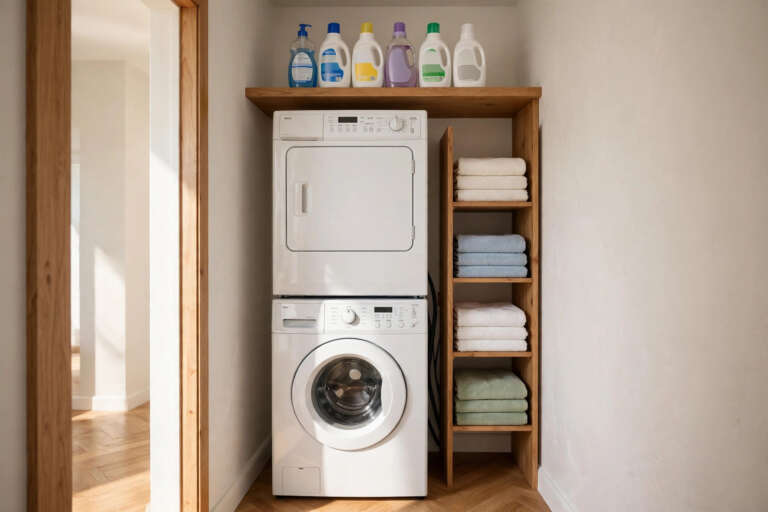
The wall above front load machines is the most wasted stretch in most laundry rooms. Two sturdy open shelves there put detergent, stain treatments and folded towels at eye level, right where the work happens. Keep shelves shallow, around ten to twelve inches, so nothing hides at the back. Store daily products in front, refills higher up, and group small bottles on a tray so a whole category lifts down in one trip. Brackets screwed into studs matter here, because a shelf of liquid detergent is heavier than it looks. Leave one small section of shelf deliberately empty for a plant or a framed print, so storage still feels styled.
5. Upgrading to High-Functioning Countertops

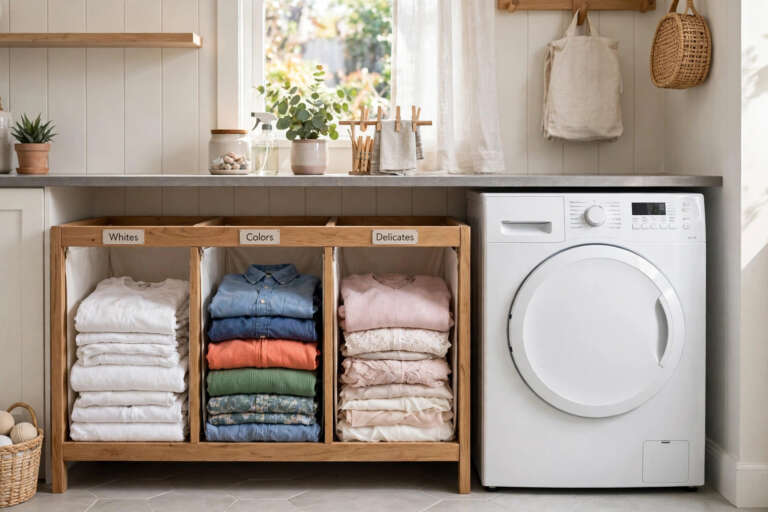
A counter over front loading machines changes laundry day more than any decorative upgrade. It gives you a full width folding surface at a comfortable height, catches socks that would otherwise slide behind the machines, and turns sorting into a standing job instead of a floor job. Butcher block suits warm and farmhouse rooms, while a plain laminate keeps budgets low and wipes clean in seconds. Measure carefully around hoses and leave the counter removable so machines can be serviced. Add a small lip or tray at one end for the folded piles waiting to travel upstairs, and keep the surface clear enough that folding never moves elsewhere.
6. Smart Lighting for Dark Workspaces

Many laundry rooms rely on one tired ceiling bulb, which is why stains get missed and the room feels like a cupboard. Layer the light instead. A brighter ceiling fixture handles general visibility, a strip of LED light under the shelf or cabinet washes the counter where you treat stains and fold, and warm bulbs keep the room from feeling clinical. Motion sensor strips are a small luxury when your arms are full of washing. Choose bulbs with a high color rendering rating if you can, because whites and colors read more truthfully, and sorting navy from black stops being guesswork.
7. Innovative Drying Solutions

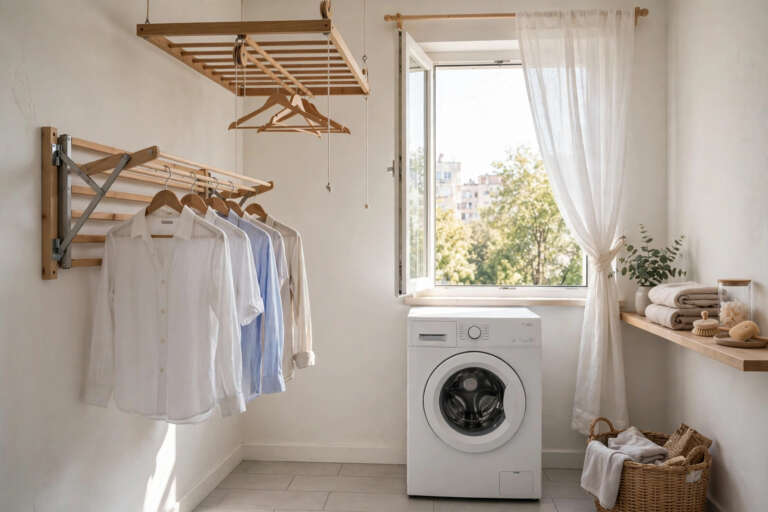
Delicates, swimwear and anything with elastic last longer when they air dry, so a makeover needs a real home for them. A wall mounted accordion rack folds flat against the wall and pulls out only when needed, which suits narrow rooms perfectly. A retractable line across a bathtub or utility sink catches drips safely. If you have a spare stretch of wall, a simple rail with hangers handles shirts straight from the washer, cutting ironing later. Place drying near airflow, an extractor fan, a window or a heating vent, and damp laundry will dry overnight instead of haunting the room for days.
8. Flooring That Stands Up to Moisture

Laundry floors take leaks, drips and dragged baskets, so choose a surface that treats water as a minor event. Luxury vinyl plank is the forgiving favorite. It is waterproof in most ranges, soft underfoot during long folding sessions and easy to lay over a sound existing floor. Patterned ceramic tile handles water just as well and brings the personality, though grout needs sealing and a mat softens it for standing. Whatever you pick, run it wall to wall rather than around the machines if you can. One continuous floor makes the room feel larger and leaves nowhere for lost socks and lint to hide.
9. Organizing with Baskets and Bins

Matching baskets are the fastest route from messy shelves to a calm after photo, but the system matters more than the look. Give every category its own container, one for wash day products, one for stain and repair supplies, one for cleaning cloths and a lost sock basket that the whole family actually uses. Decant powder and pods into labeled jars with scoops, and keep one small caddy that travels to wherever a spill or stain emergency happens. Open baskets beat lidded boxes in this room, because a lid is one more step between you and the product you need with wet hands.
10. Adding Personality with Hardware and Decor

Once the room works, it deserves to look like part of your home rather than a service corridor. Swapping basic cabinet knobs for matte black, brushed brass or simple ceramic pulls makes plain doors look custom for very little money. A washable runner adds color and catches drips in front of the machines, and one piece of art or a humorous laundry print gives the room a point of view. Repeat a metal finish from elsewhere in the house and the room joins the family. Keep decor to the walls and one shelf, so surfaces stay free for the real job.
11. Maintenance Tips for Your New Space

The difference between a makeover that lasts and one that fades by June is a five minute reset. Wipe the machine tops and counter after the last load, return products to their baskets, empty the lint filter and the lost sock basket, and sweep the floor corner where fluff gathers. Weekly, run the machine cleaning cycle and check hoses and filters, because a well kept room is also a safer one. Restock from a simple list on the door so you never discover empty detergent mid wash. Small habits protect the money and effort you put into the transformation far better than any single product.
Conclusion
A laundry room makeover does not have to happen in one dramatic weekend. Taken in order, layout, color, storage, surfaces, light and small systems each change how the room feels, and together they turn wash day from a chore you dodge into a job that runs itself. Photograph your own before, work through the list at your pace, and take the after when the room stays tidy for a full week. That staying power, not the paint color, is the real transformation, and it is the part your household will appreciate every single day of the week.
When you are ready for more, these cute laundry room decor ideas round it out.
Frequently Asked Questions
How much does a laundry room makeover cost?
It depends entirely on how far you go. Paint, baskets and shelving can refresh a room on a small budget, while counters, new flooring and cabinets raise the total. Work in the order of this guide and spend first on layout, light and storage, because those change daily life the most.
What should I do first in a small laundry room?
Start with the layout and the vertical storage. A folding surface over front load machines and shelves above them solve the two biggest small room problems, piles and clutter, before any decorating begins. Measure carefully, because small rooms punish guesswork.
Which flooring is best for a laundry room?
Luxury vinyl plank is the most forgiving choice for most homes. It handles leaks and drips, feels warmer underfoot than tile and is simple to clean. Ceramic tile is equally durable and prettier in patterned designs, but add a washable mat where you stand to fold.
How do I keep the room tidy after the makeover?
Give every product a basket, keep counters clear on purpose, and do a five minute reset after wash day. A labeled lost sock basket and a restock list on the door stop the two messes that quietly undo most makeovers.