Small office consumables—pens, sticky notes, cable ties, printer maintenance kits, hand soap refills, and snack items for shared spaces—often end up in mismatched containers that waste space, hide stock levels, and make restocking more time-consuming. This guide focuses only on selecting bins for these specific items, separate from supply reordering rules, cabinet layout plans, or file storage solutions covered in other resources. The goal is to pick bins that work for your existing space and usage patterns, not force your team to adjust to a one-size-fits-all storage system.
Start by Auditing Your Consumable Types and Sizes First
Before shopping for bins, map exactly what you need to store. Sort your current consumable stock into categories by physical size, usage frequency, and access restrictions. For example, loose ballpoint pens are small, high-frequency, and accessible to all team members, while replacement printer fusers are large, low-frequency, and restricted to admin staff only. Measure the dimensions of each category’s typical packaging: a pack of sticky note pads may have a different footprint than a pack of ballpoint pens, and you will need bins that fit those units without forcing you to remove items from their original packaging, which can cause small parts to get lost or damaged.
Note any special handling requirements: consumables with special storage requirements should remain in their original packaging and be stored as their manufacturer directs, while items that need to be visually inventoried at a glance work best with clear or semi-clear sides. For consumables that come in individual single-use portions, like hand sanitizer packets or snack bars, prioritize bins that let you stack or line up portions without crushing them.
Match Bin Dimensions to Your Existing Storage Spaces
Bins do you no good if they do not fit the shelves, cabinets, or drawers you already use. Measure the internal dimensions of your storage locations first: internal shelf depth, height between shelves, and drawer width, not just the external furniture measurements. Leave at least a small gap between the bin edge and the shelf or drawer frame to make pulling the bin out easy, even when it is full. For upper shelves, avoid bins that are so tall you cannot see the contents over the front edge when you are standing on the floor. For lower cabinets or under-desk storage, prioritize bins with reinforced bases that can hold heavier items like liquid soap refills without sagging.
If you use mobile supply carts to move consumables between work areas, check the cart’s shelf dimensions and weight limits as well, to ensure bins fit securely and do not slide off when the cart is in motion. Bins with integrated lip edges that hook onto cart shelves can reduce movement during transport, but only if the lip matches the thickness of your cart’s shelf edges.
Evaluate Access Features for Your Team’s Usage Patterns
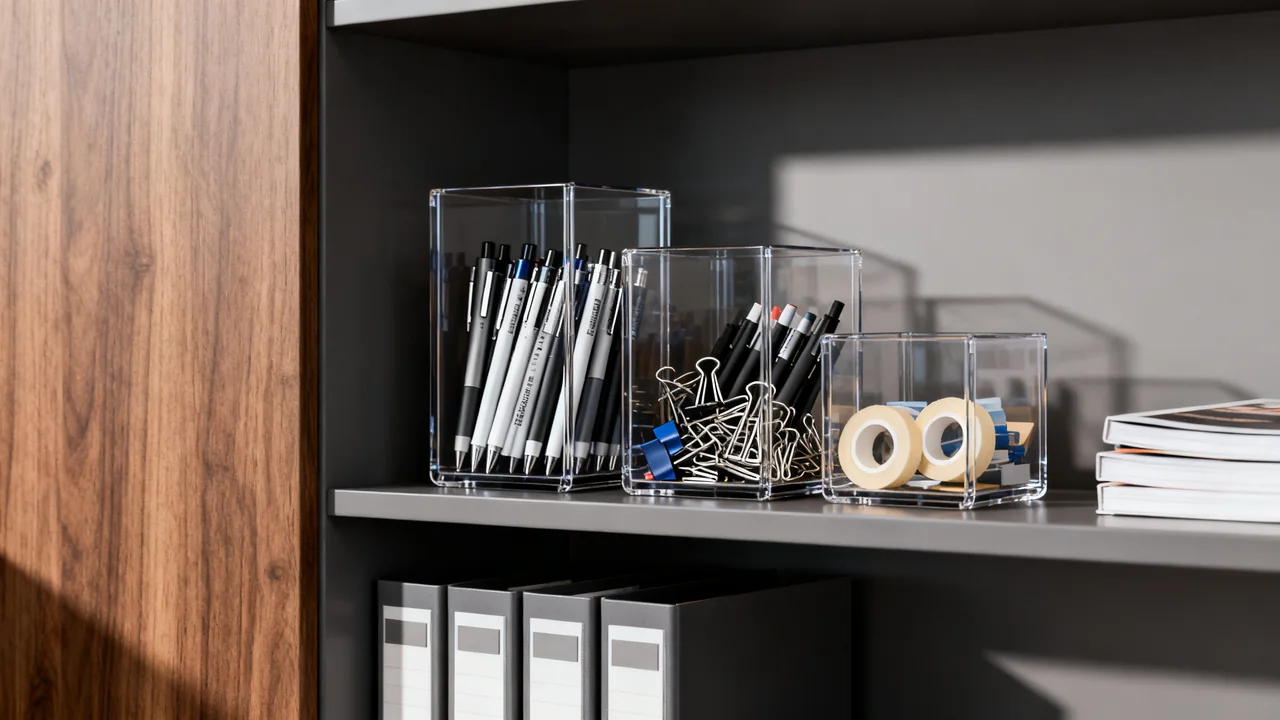
Bin access features should align with how often your team interacts with each consumable type. For high-frequency items like pens or sticky notes used by all team members, open-top bins with wide openings eliminate the need to fumble with lids, and make it easy to grab an item without removing the entire bin from the shelf. For low-frequency or restricted items like specialty printer parts or office first-aid refills, lidded bins can help contain items and reduce dust. A snap lid is not an access control; use suitable restricted storage where access must be limited.
Handle placement matters for bins you pull out frequently: recessed side handles take up less space than external molded handles, which can add width to the bin’s footprint and reduce how many bins you can fit on a single shelf. For bins that hold heavy items like case packs of paper towels, look for handles reinforced with thicker plastic, to avoid cracking when the bin is fully loaded. Always check the manufacturer’s stated load limit for any bin you plan to fill with heavy consumables, to avoid breakage or spills.
Assess Material Durability and Cleaning Requirements
Match the actual bin construction to the contents. Smooth, accessible surfaces are easier to inspect and wipe than narrow recesses. Check the stated load limit, the handles, and any stacking restrictions instead of assuming a material name alone proves strength.
Keep cleaning products in their original containers, separate from food and sensitive equipment, and follow their storage instructions. A general storage bin is not automatically a suitable spill-containment tray. Check compatibility and the intended use before relying on it to hold a leak.
Where food directly contacts a bin, confirm that it is intended for that use. Sealed snack packets and loose food present different storage needs. Follow the bin maker’s cleaning directions, remove contents before cleaning, and let the bin dry before returning supplies.
Illustrative Example: Bin Selection for a Hypothetical 7-Person Marketing Office
Suppose a small office measures a cabinet shelf as 30 inches wide and 12 inches deep, with 10 inches of vertical clearance. Three bins each 9 inches wide use 27 inches of width, leaving 3 inches in total for gaps and side clearance. That is a dimensional planning example, not proof that a particular product fits: handles, tapered sides, hinges, and the space needed to lift a bin still need checking.
The office tries one clear open bin for everyday stationery and one lidded, divided bin for small adapters. Printer consumables remain in their original packaging in a labeled location that meets their storage instructions. Food and cleaning refills use separate appropriate storage rather than being grouped together simply because the containers match.
Before ordering the full set, the supply owner loads the sample bins and checks access, identification, cleaning, and whether the shelf can carry the intended load. The result to record is whether those tasks work; no time-saving figure is assumed.
Bin Feature Comparison for Common Consumable Categories
| Contents | Feature to consider | Question before buying |
|---|---|---|
| Loose stationery | Visible contents and an accessible opening | Can users retrieve one item without spilling the rest? |
| Small adapters | Dividers and clear identification | Can similar but incompatible items be kept separate? |
| Printer consumables | Space for original packs and readable labels | Does the location meet the product storage instructions? |
| Food | A container intended for the proposed food-storage use | Will food touch the bin directly? |
| Cleaning refills | Compatible, separate storage | Do the product instructions call for special containment? |
Tradeoffs to Consider for Your Office’s Specific Needs
No bin is perfect for every use case, so you will need to weigh these common tradeoffs based on your team’s priorities:
- Clear vs. opaque bins: Clear bins make visual inventory checks fast, but can look cluttered with mismatched packaging. Opaque bins can look neater, but require you to open the lid or label the outside clearly to see what is inside.
- Standardized vs. custom-sized bins: All bins matching the same dimensions make it easy to rearrange your storage shelves as your consumable stock changes, but check whether replacement lids and additional bins are actually available. Custom-sized bins fit awkward shelf spaces perfectly, but you may not be able to find matching replacements if the manufacturer discontinues that specific size.
- Lidded vs. open-top bins: Lidded bins can reduce dust and help contain loose items, but ordinary lids are not necessarily liquid-tight, but add extra time for team members accessing high-use items, and can lead to stock being forgotten if the lid is rarely opened. Open-top bins are easy to access, but collect dust if stored in high-traffic areas near open windows or doors, and small items can fall out if the bin is bumped.
- Divided vs. single-compartment bins: Divided bins let you store multiple small consumable types in a single bin without them mixing together, but fixed dividers may not accommodate larger items later; adjustable dividers offer more flexibility. Single-compartment bins are more flexible for changing stock, but require you to use multiple bins for small, similar items, which takes up more shelf space.
Pre-Purchase Actionable Checklist
Before you place an order for new bins, run through this short checklist to avoid common mistakes:
- Measured the internal dimensions of all relevant storage locations (shelves, cabinets, drawers, carts) and noted any obstructions like shelf brackets or cabinet door hinges that reduce usable space
- Sorted all current consumables into categories and measured the dimensions of typical packaging for each category to ensure bins fit unopened packs
- Identified any special requirements for consumables (light sensitivity, leak risk, food contact, access restrictions) that will impact bin material and feature choices
- Confirmed that the bin’s stated load limit matches the maximum weight of the consumables you plan to store in it
- Checked that any lidded bins you select can be opened with one hand, if team members will be accessing them while carrying other items
- Verified that the bin material is compatible with your office’s standard cleaning products, per the manufacturer’s cleaning instructions
If you are unsure about a specific bin model, buy one unit first to test with your consumables and storage space before purchasing a full set. This lets you confirm the bin fits your shelves, holds the intended items comfortably, and works with your team’s usage habits before you invest in a full matching set.
Have a question or a correction?
Contact the editorial team