Office storage cabinet mispurchases waste budget, disrupt workflow, and create unnecessary safety hazards: a cabinet that blocks a fire exit, shelves that cannot fit standard binder sizes, or doors that scrape against adjacent furniture when opened. This guide walks you through every measurement you need to collect before you browse options, and provides a structured sheet to organize your data for consistent comparison across products. All measurements should be verified against manufacturer specifications before you place an order, as custom or non-standard cabinet sizes may not align with generic assumptions.
Step 1: Measure the Exact Installation Footprint First
The footprint is the floor or wall space the cabinet will occupy when fully installed, and it is the first measurement to confirm to eliminate options that cannot fit at all. Start by clearing any temporary items from the proposed installation spot, including trash cans, loose cables, or stacked boxes that may skew your readings.
For freestanding cabinets: measure the width and depth of the open floor space, making sure to exclude any baseboard trim, outlet covers, or wall-mounted power strips that protrude from the wall. If the cabinet will sit against a wall with a baseboard, measure the depth of the baseboard itself, and note that you will either need a cabinet with a recessed back to fit over the trim, or enough extra depth space to leave the cabinet slightly away from the wall.
For wall-mounted cabinets: measure the width and height of the open wall space, and mark the locations of any wall studs, electrical outlets, data ports, or light switches that fall within that area. Have the mounting method, wall construction, fixings, and loaded weight confirmed against the cabinet instructions by an appropriate installer, and that the cabinet body will not cover any outlets or switches that need to remain accessible. If the cabinet will be mounted above a desk or other furniture, measure the height from the top of that furniture to the lowest point of any ceiling obstructions (like light fixtures or air vents) to set a maximum height for the cabinet itself.
Measure twice for each dimension, and record both readings to catch any measurement errors. Resolve inconsistent readings before choosing a product, using precision appropriate to the available clearance.
Step 2: Calculate Required Clearance for Doors, Drawers, and Access
Use the exact cabinet’s dimensional drawing or a sample rather than a generic door-width formula. Record the space occupied by the body, handles, moving doors or drawers, and the person retrieving items.
- Hinged doors: Check the door’s swept path and the opening angle required for access. Hinge position and projections affect clearance. Opening to 180 degrees does not simply double the front depth required; side clearance can be the constraint.
- Drawers: Check full extension, handle projection, and usable standing or seated access. Confirm the required anchoring and any interlock arrangement before operation.
- Sliding doors: Check the clear opening available with each panel moved. Do not assume it is exactly half the cabinet width; designs vary.
Keep required routes and safety equipment clear in both the closed and in-use positions. Confirm building and workplace requirements with the responsible facilities contact rather than treating furniture fit as proof of compliant access.
Illustrative Example: Small Admin Office Storage Cabinet Purchase
Suppose an office measures a nook as 36 inches wide and considers a cabinet with a 34-inch external width. That leaves two inches in total before accounting for any uneven walls, trim, installation instructions, or handling clearance. This is hypothetical dimensional arithmetic, not a recommended installation gap.
The buyer also measures the largest binder and supply box, then compares their dimensions with the cabinet’s usable shelf depth, height, and door opening. The product’s external depth alone cannot establish whether those items fit.
Finally, the buyer marks the cabinet footprint and the actual door or drawer envelope from the product drawing. If the open cabinet interferes with the required walkway or prevents comfortable access, the buyer chooses a different layout or model. Sliding doors are an option to assess, not an automatic solution.
Step 3: Measure Internal Storage Dimensions for Your Specific Items
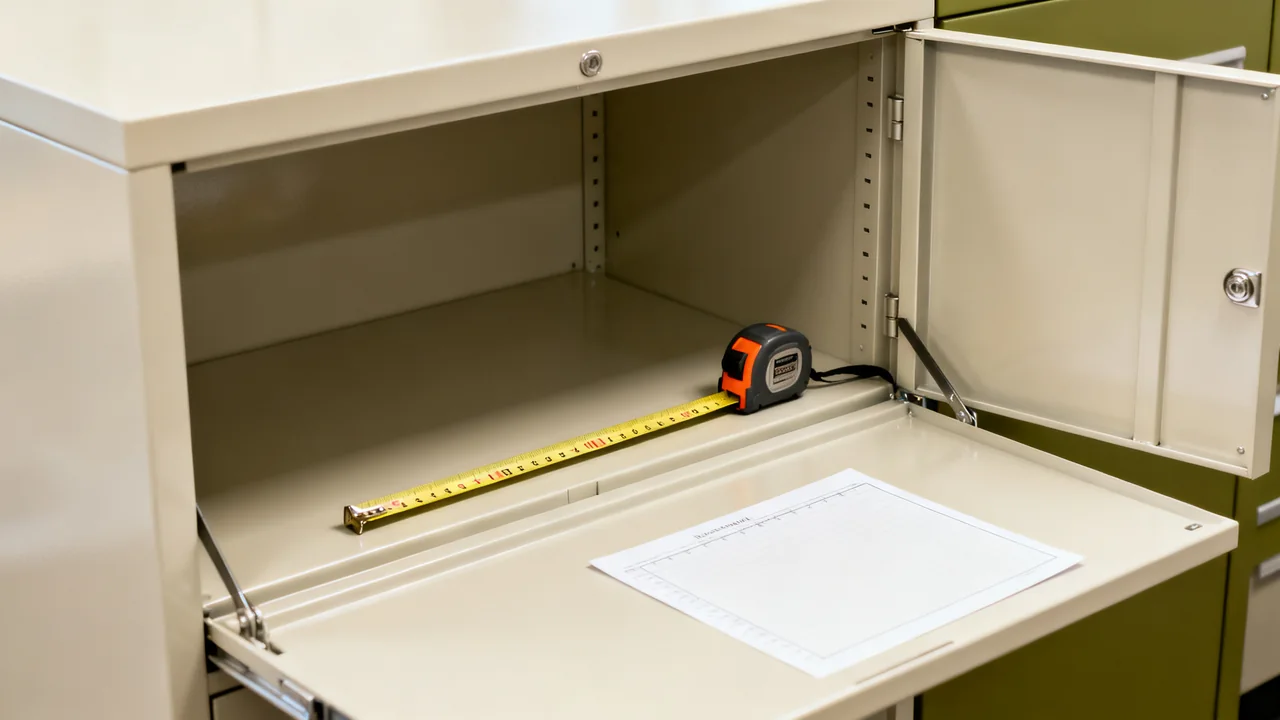
External cabinet dimensions do not always translate to usable internal storage space, especially if the cabinet has thick walls, integrated framing, or fixed shelf placements. Start by measuring the largest items you plan to store in the cabinet to set minimum internal dimension requirements.
For standard office items: measure the width, depth, and height of binders, file folders, supply boxes, printer paper reams, and any equipment (like spare laptops or printer parts) that will be stored inside. Add a small buffer of extra space to each dimension to make it easy to slide items in and out without scraping or jamming. If you plan to store hanging file folders, confirm that the internal width of the cabinet matches the required hanging rail spacing for either letter or legal size files, as these are not interchangeable.
For adjustable shelves: note the minimum and maximum height between shelves, and the number of adjustment positions available, as listed in the manufacturer’s specifications. If you plan to store a mix of tall and short items, calculate how many shelves you will need at different height settings to maximize storage capacity for your specific inventory. For fixed shelves, measure the exact height between each shelf to confirm none of your stored items will be too tall to fit.
For specialized storage: if the cabinet will include lockable drawers, file rails, or accessory bins, measure those components separately to confirm they fit your intended use. For example, a lockable drawer designed for small office supplies may be too shallow to store laptop chargers or larger accessories, even if the overall cabinet size is correct.
Step 4: Verify Compatibility with Existing Furniture and Building Features
Even a cabinet that fits perfectly in its intended spot may create unexpected issues if it conflicts with existing office features or furniture. Measure these additional factors before finalizing your selection:
- Walkway clearance: measure the width of any adjacent walkways with the cabinet fully installed and doors/drawers open. Confirm that the remaining walkway width meets your office’s accessibility needs, and that the cabinet does not block any emergency exits, fire extinguishers, or first aid kits. If your facility has specific egress width requirements, cross-reference your measurements with those rules before proceeding.
- Overhead obstructions: for tall freestanding or wall-mounted cabinets, measure the distance from the top of the planned cabinet location to the ceiling, and confirm there is no conflict with ceiling lights, air vents, sprinkler heads, or cable trays. If the cabinet will be placed under a window, confirm it does not block the window opening or interfere with window blinds or shades.
- Power and data access: if the cabinet will be placed near wall outlets or data ports, confirm it does not block access to those ports for other equipment (like printers or desk phones) that need to be plugged in nearby. If you plan to install charging ports or powered accessories inside the cabinet, measure the distance from the cabinet location to the nearest accessible outlet to confirm you can run a power cord without creating a tripping hazard, per your workplace’s safety guidelines for cord routing.
- Floor surface compatibility: if you are purchasing a freestanding cabinet on casters, measure the height of any floor transitions (like carpet to tile) near the cabinet location to confirm the casters can roll over the gap without getting stuck. For heavy cabinets filled with files or equipment, confirm the floor weight rating for the installation spot can support the total loaded weight of the cabinet, following your building’s guidance for floor load limits.
Cabinet Measurement Comparison Table
Use this table to organize measurements for up to three cabinet options you are evaluating, to make side-by-side comparison easy. All values should be filled in with your actual measured data, not estimated values.
| Measurement Category | Your Required Minimum/Maximum | Cabinet Option 1 | Cabinet Option 2 | Cabinet Option 3 |
|---|---|---|---|---|
| External width | ||||
| External depth | ||||
| External height | ||||
| Required front clearance (doors/drawers open) | ||||
| Internal shelf depth | ||||
| Adjustable shelf height range | ||||
| Hanging file rail spacing (if applicable) | ||||
| Total loaded weight capacity |
Common Tradeoffs to Guide Your Final Selection
Most cabinet purchases require balancing competing priorities, so use these tradeoff guidelines to make the right choice for your team’s needs:
- Freestanding vs. wall-mounted: Freestanding cabinets are easier to install and relocate, but they take up floor space and may tip over if not anchored to the wall (follow manufacturer anchoring instructions for all tall freestanding units). Wall-mounted cabinets free up floor space and are easier to clean under, but they require a mounting design suited to the wall construction and loaded cabinet, verified against the manufacturer’s and building’s requirements.
- Hinged vs. sliding doors: Hinged doors provide full access to the cabinet interior at once, but require more front clearance to open. Sliding doors can reduce the door-swing envelope, but their usable opening depends on the design and may accumulate dirt or debris in the door tracks over time, requiring regular cleaning to maintain smooth operation.
- Fixed vs. adjustable shelves: Fixed shelves limit rearrangement; adjustable shelves offer more flexibility. Compare the actual per-shelf and total ratings for each product rather than assuming one type is stronger.
- Locked vs. unlocked storage: A suitable locking cabinet can support an access-control plan for sensitive items, but they require key management and may be less convenient for shared supplies that the whole team needs to access. Unlocked cabinets are easier for the whole team to use, but they do not provide any security for valuable or confidential items.
Pre-Purchase Measurement Verification Checklist
Complete this short checklist before placing your order to avoid common measurement errors:
- All footprint measurements have been taken twice, and account for baseboards, outlet covers, and wall protrusions
- Door/drawer clearance measurements have been tested by marking the floor with painter’s tape to simulate the open cabinet, confirming no walkways or exits are blocked
- Internal dimensions have been compared against the actual size of the largest items you plan to store, with extra gap space for easy access
- The wall construction, loaded weight, mounting method, and required fixings have been confirmed for wall-mounted cabinets
- Adjacent furniture, fixtures, and building features (lights, vents, sprinklers) do not conflict with the cabinet’s installed size
- All measurements have been cross-referenced against the manufacturer’s official product specifications, not just listing photos or summary descriptions
After you receive and assemble the cabinet, double-check that the actual dimensions match the manufacturer’s listed specifications before you load it with stored items. If there are any discrepancies, contact your supplier immediately to address the issue before you put the cabinet into regular use. Taking this extra verification step can prevent the frustration of loading a cabinet only to find it does not fit your intended items or space as planned.
Have a question or a correction?
Contact the editorial team