13 Headboard Alternatives for Small Bedrooms
Here is the small bedroom problem nobody warns you about.
The bed takes up most of the floor. A real headboard eats six to ten more inches behind it. And without one, the pillows slide into the gap at night and the whole room looks like you moved in last week and gave up.
I have skipped the headboard in every small room I have lived in. You do not need the furniture. You need a shape on the wall behind the pillows. The 13 headboard alternatives for small bedrooms below are all flat, light or painted on, most cost under $60, and nearly all of them come off clean when you leave.
The short version, before we start:
Paint is cheapest. One can and a roll of tape cover an arch or a rectangle, and one coat of wall color hides it when you move.
Go six inches wider. Whatever you put on the wall, run it about six inches past the mattress on each side or it looks like a halo, not a headboard.
Adhesive needs patience. Stick on panels and cushions hold fine if you wait the full cure time, usually 24 to 48 hours, before leaning pillows on them.
The bedding does half the work. Upright pillows, one cushion layer and a folded throw finish any backdrop on this list.

1. Paint the Arch and Skip the Frame
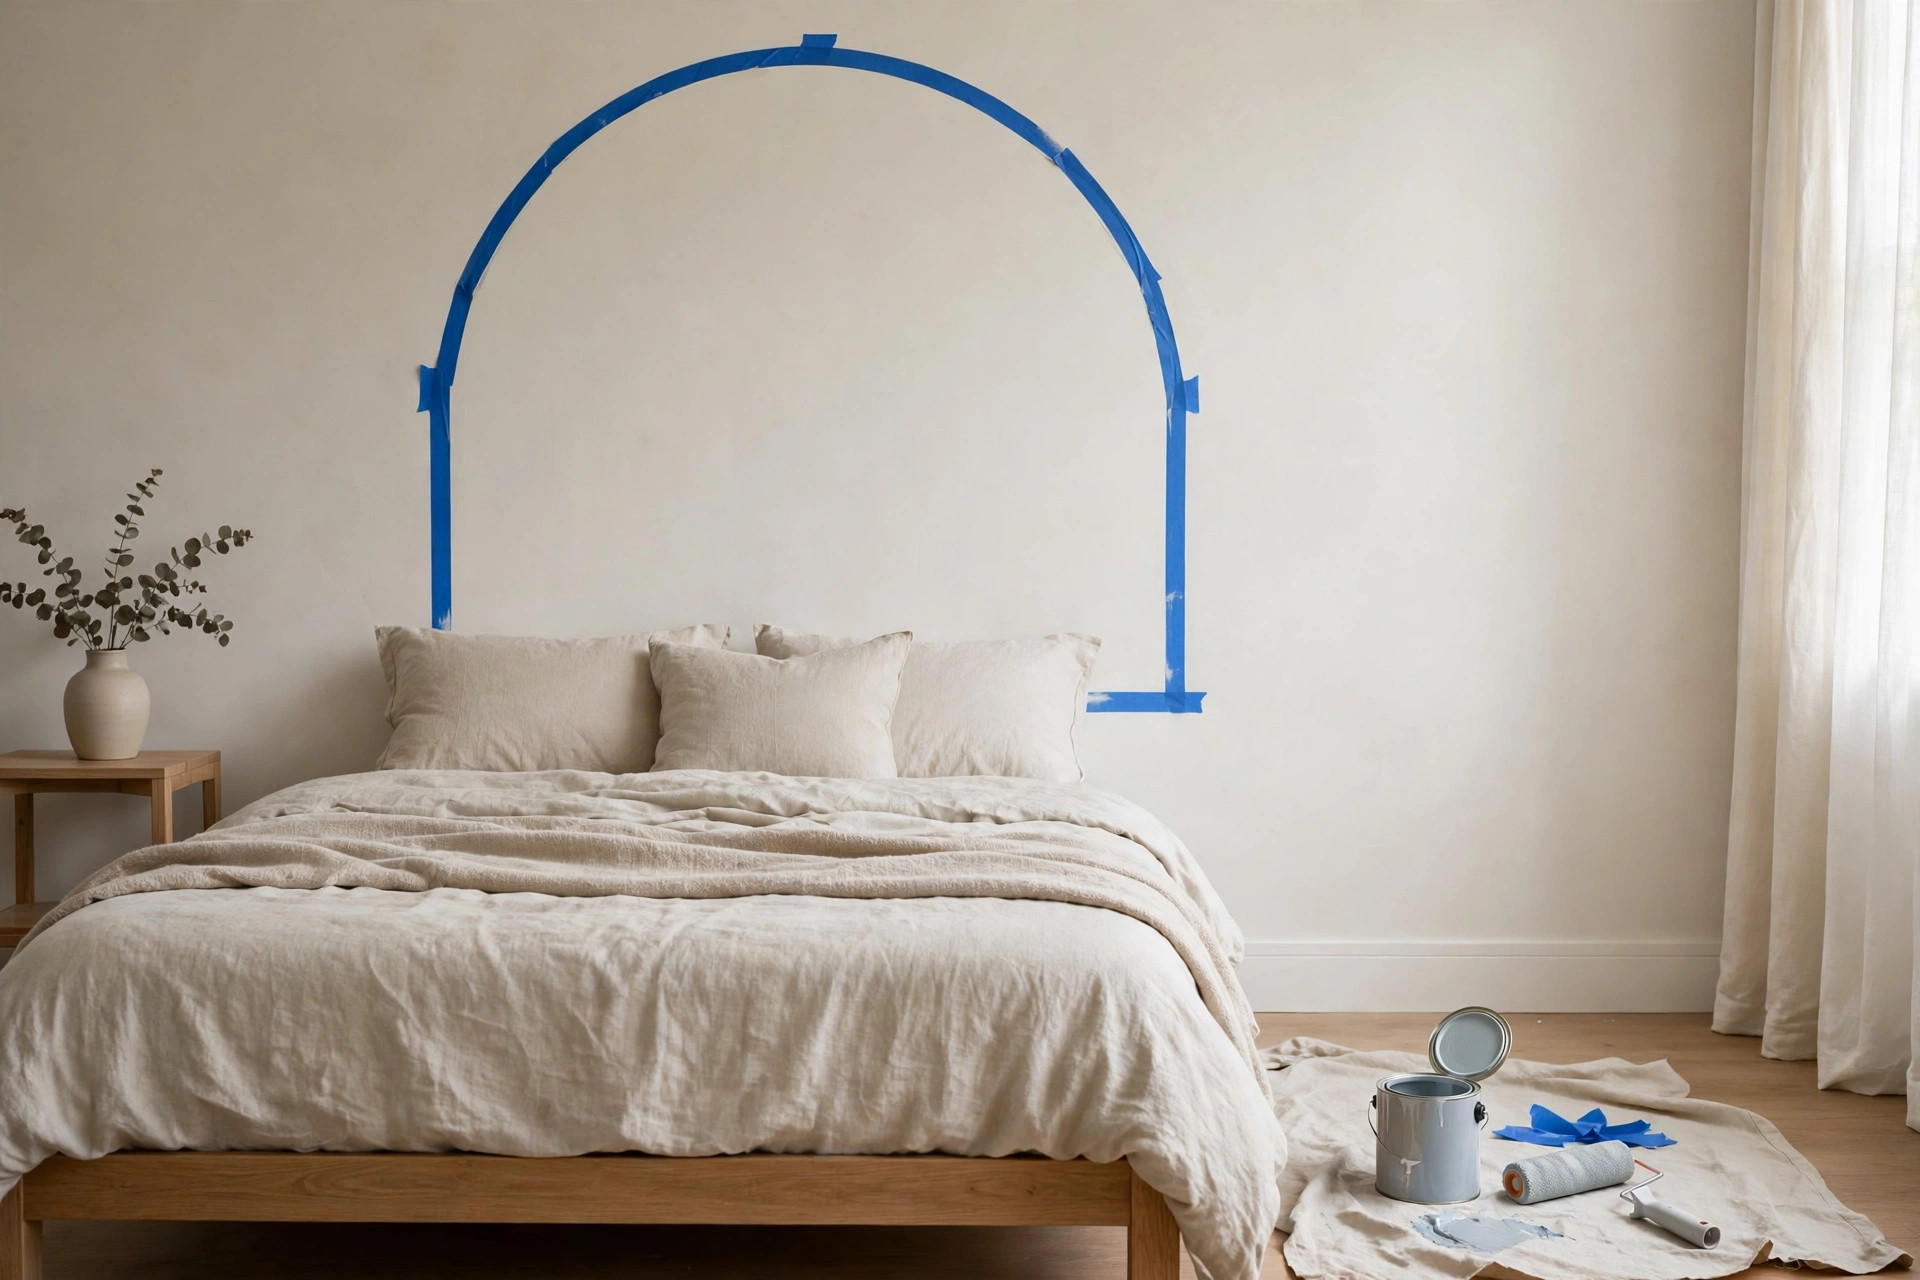
Start here if you can paint. It is the cheapest trick on the list and it works.
An arch draws the exact shape a headboard would take, only flat. Mark it with painter’s tape and a string and pencil compass, run it about six inches wider than the mattress on each side, and start it just below mattress height so the pillows sit inside the shape. Two coats of a color two shades deeper than the wall is the sweet spot. Deeper than that reads as a feature wall shouting for attention.
Pair it with the other bedroom accent wall ideas on this site and the bed wall reads as one calm, planned moment. My rule: if the arch edge wobbles, step back and fix the tape, not the paint. Wobbly tape is where homemade arches come from.
2. No Arch? Paint a Plain Rectangle Instead
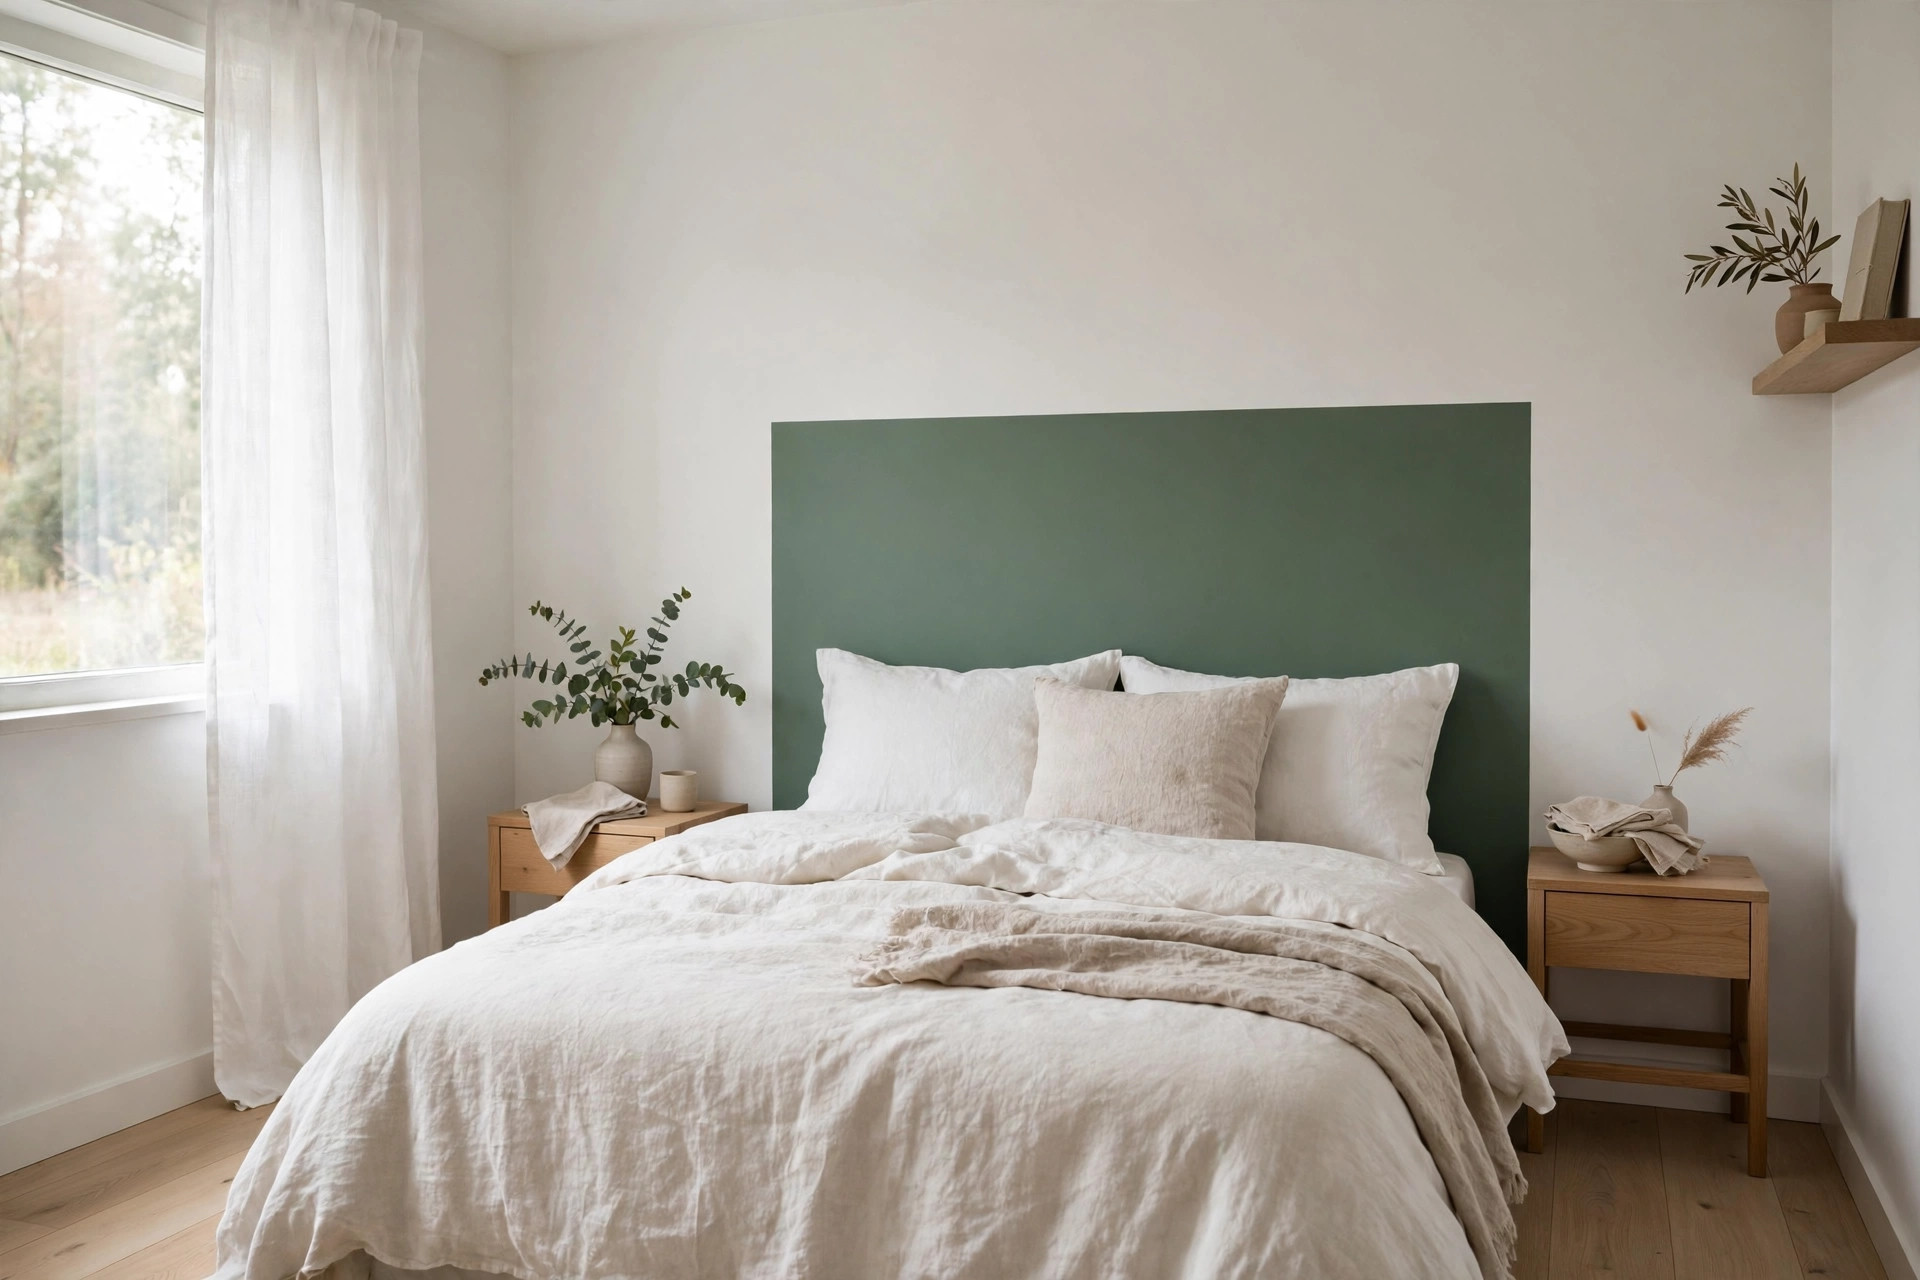
Some rooms cannot carry an arch. Too playful, too trendy, or the bed sits off center and a curve just looks wrong.
Paint a rectangle. Go slightly wider than the bed and stop about two thirds of the way up the wall, and you get a crisp panel effect that suits plain, quiet rooms far better. A straight half wall band does the same job lower down, a horizon line the pillows lean against. Use a level, and press the tape edges down hard with a fingernail before the first coat, because paint bleed under loose tape is the one mistake that makes this look cheap. Everything else about it is forgiving.
3. Hang a Curtain Where the Headboard Should Be

A curtain on a slim rod, or on a stick on rail if you rent, gives you the softness of an upholstered headboard with none of the bulk behind the bed.
Hang it high, close to the ceiling, and let it drop to just below the mattress. Run it a little wider than the bed so the gathers have room to look generous instead of stretched. Linen look fabric is my pick, because it hangs softly and hides a tired, marked rental wall completely in one move. That is why this trick keeps showing up in roundups of aesthetic bedroom decor ideas for rentals.
Heads up: a curtain behind pillows collects dust faster than a wall does. Shake it out or wash it monthly, or the soft backdrop turns grey at pillow height.
4. Stick On Panels, but Get the First One Straight
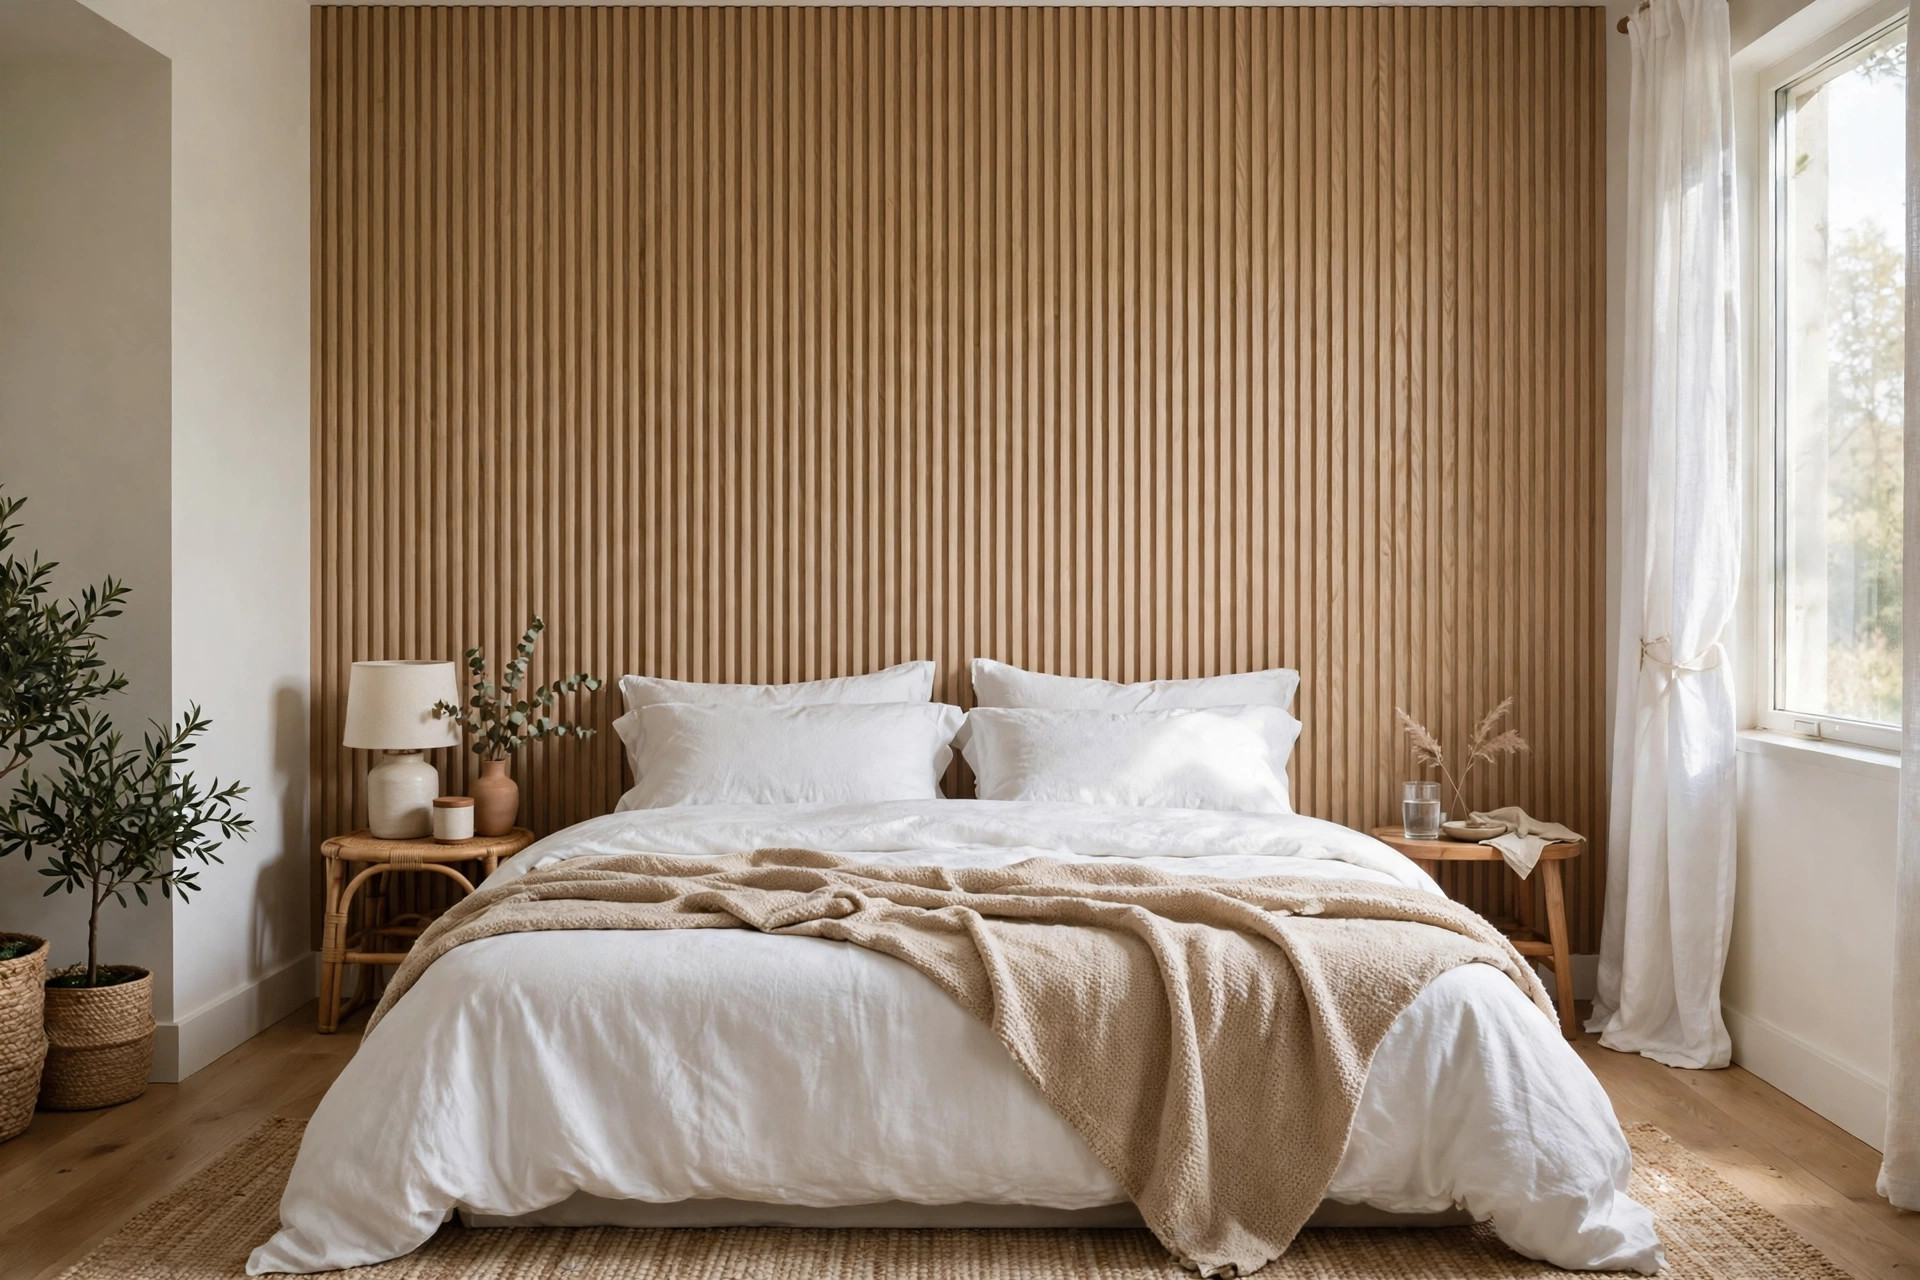
Peel and stick panels in fluted, arched or cushioned designs arrive in a box and go up in an afternoon, and decent ones come off clean at move out.
Here is the catch, and it is the whole job: the first panel decides everything. Every panel after it follows its line, so spend ten of your minutes on panel one with a level and a pencil line, not on the nine that follow. Run the row the width of the bed plus a small margin each side. Wipeable finishes earn their place here, since hair and pillowcases rest against this spot daily. This is one of those budget friendly bedroom decor hacks that trades bulk for surface, and it looks far more expensive than it is.
Skip the ultra cheap panels with shiny plastic faces. Under bedroom light they read as fake from the doorway.
5. Fit Slim Wood Slats Only Behind the Bed
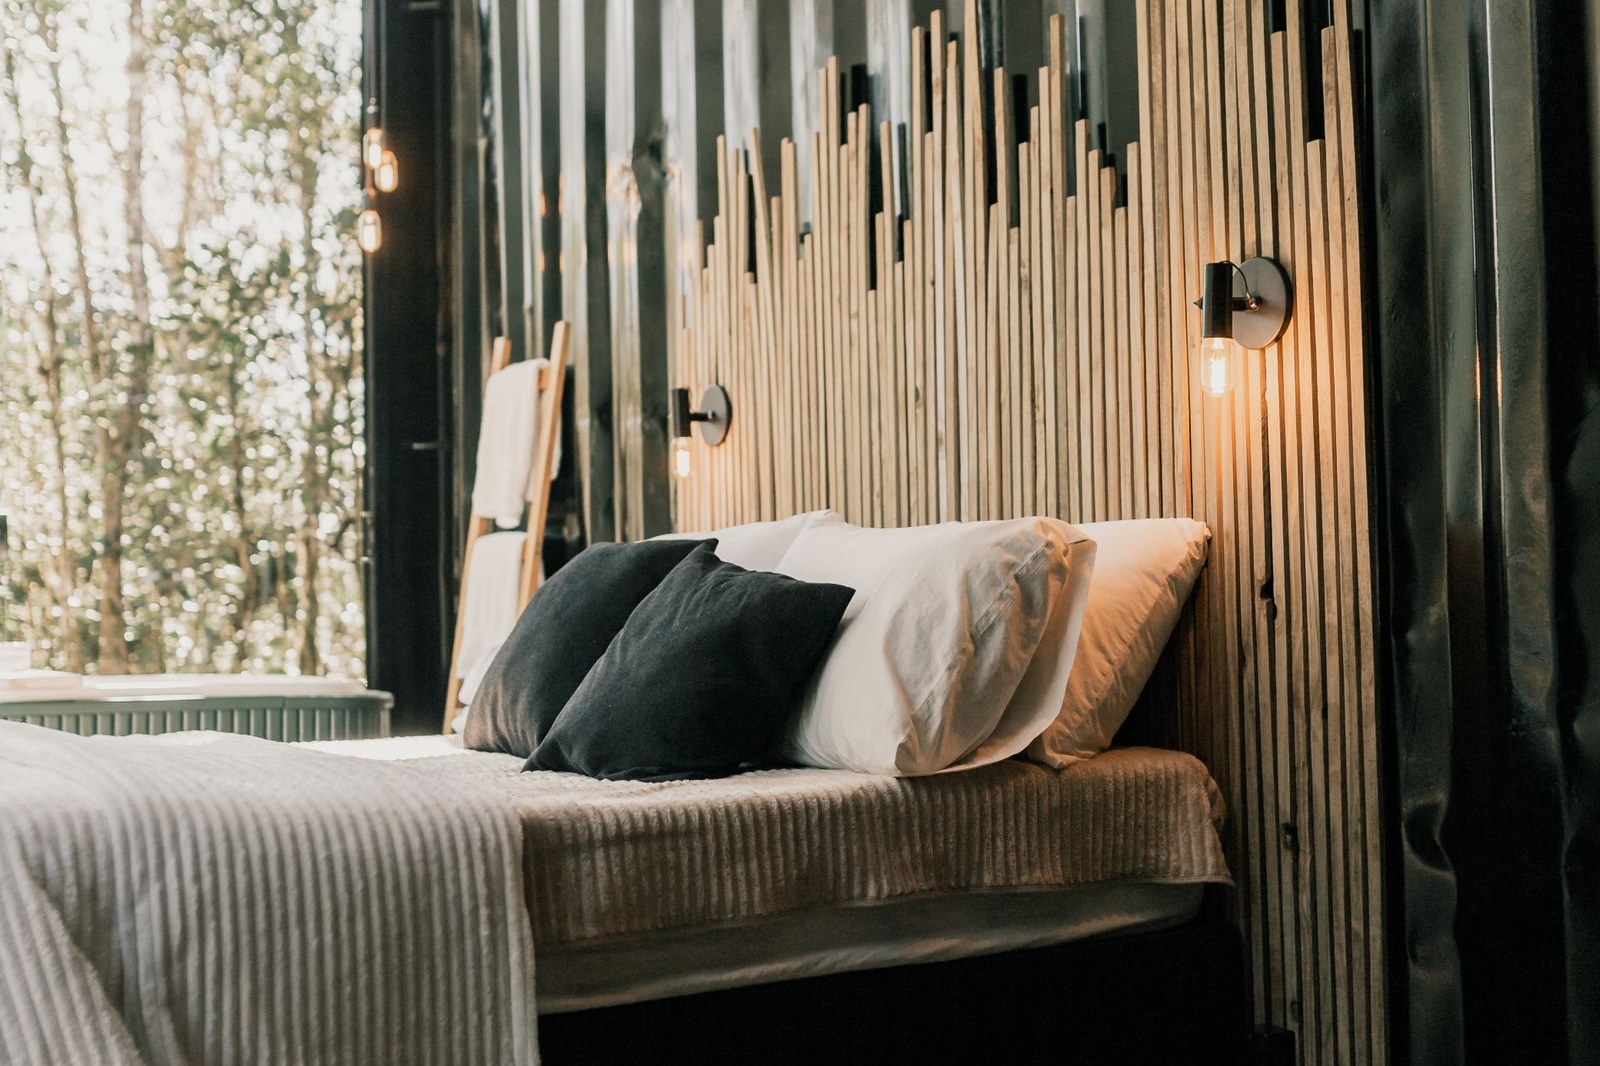
Wood slats bring the warmth, and the vertical lines make a low ceiling feel less low. Fit them behind the bed only.
Covering the whole wall is where this idea gets pricey, and it is not needed. A panel the width of the bed, roughly 60 inches for a queen, gives you the tailored built in look for a fraction of the material. Leave hairline gaps between the slats, about an eighth of an inch, because the thin shadow lines are what make it look expensive. Keep the bedding plain and pale so the wood stays the star.
Owners can fix slats to battens. Renters, look for the panel and adhesive versions instead, and test one slat on a hidden patch first.
6. Hang One Long Shelf and Lose Both Nightstands
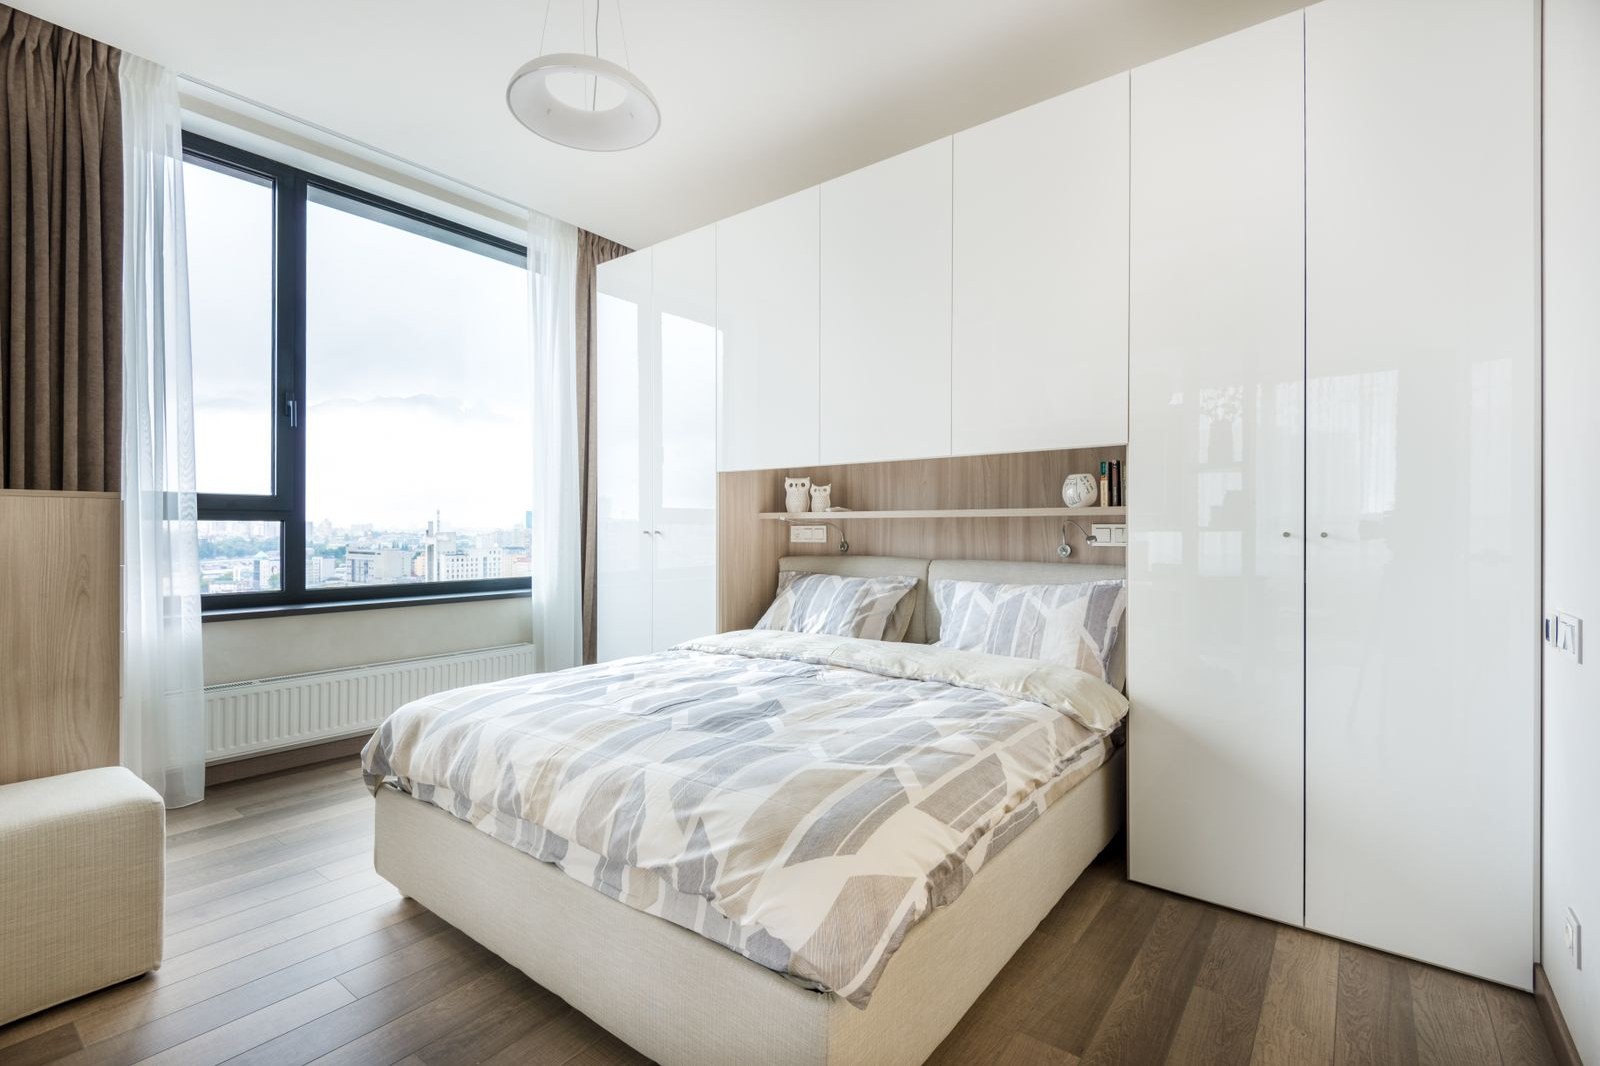
This is the hardest working idea here. A single shelf just above pillow height caps the bed like a headboard, holds your book, lamp and water, and in a truly tiny room it replaces both nightstands at once.
Keep it shallow. Eight to ten inches deep is plenty, and nothing up there should be heavy. A shelf over a sleeping head is not the place for a row of hardbacks or a big ceramic vase, so style it light: paperbacks, a small lamp, one trailing plant. I keep mine almost bare, two books and the lamp, and it still reads as a finished headboard from the door.
Measure your wall studs before you buy the shelf, not after. A long shelf on plasterboard anchors alone will sag by Christmas.
7. A Tapestry Weighs Almost Nothing. Use That.
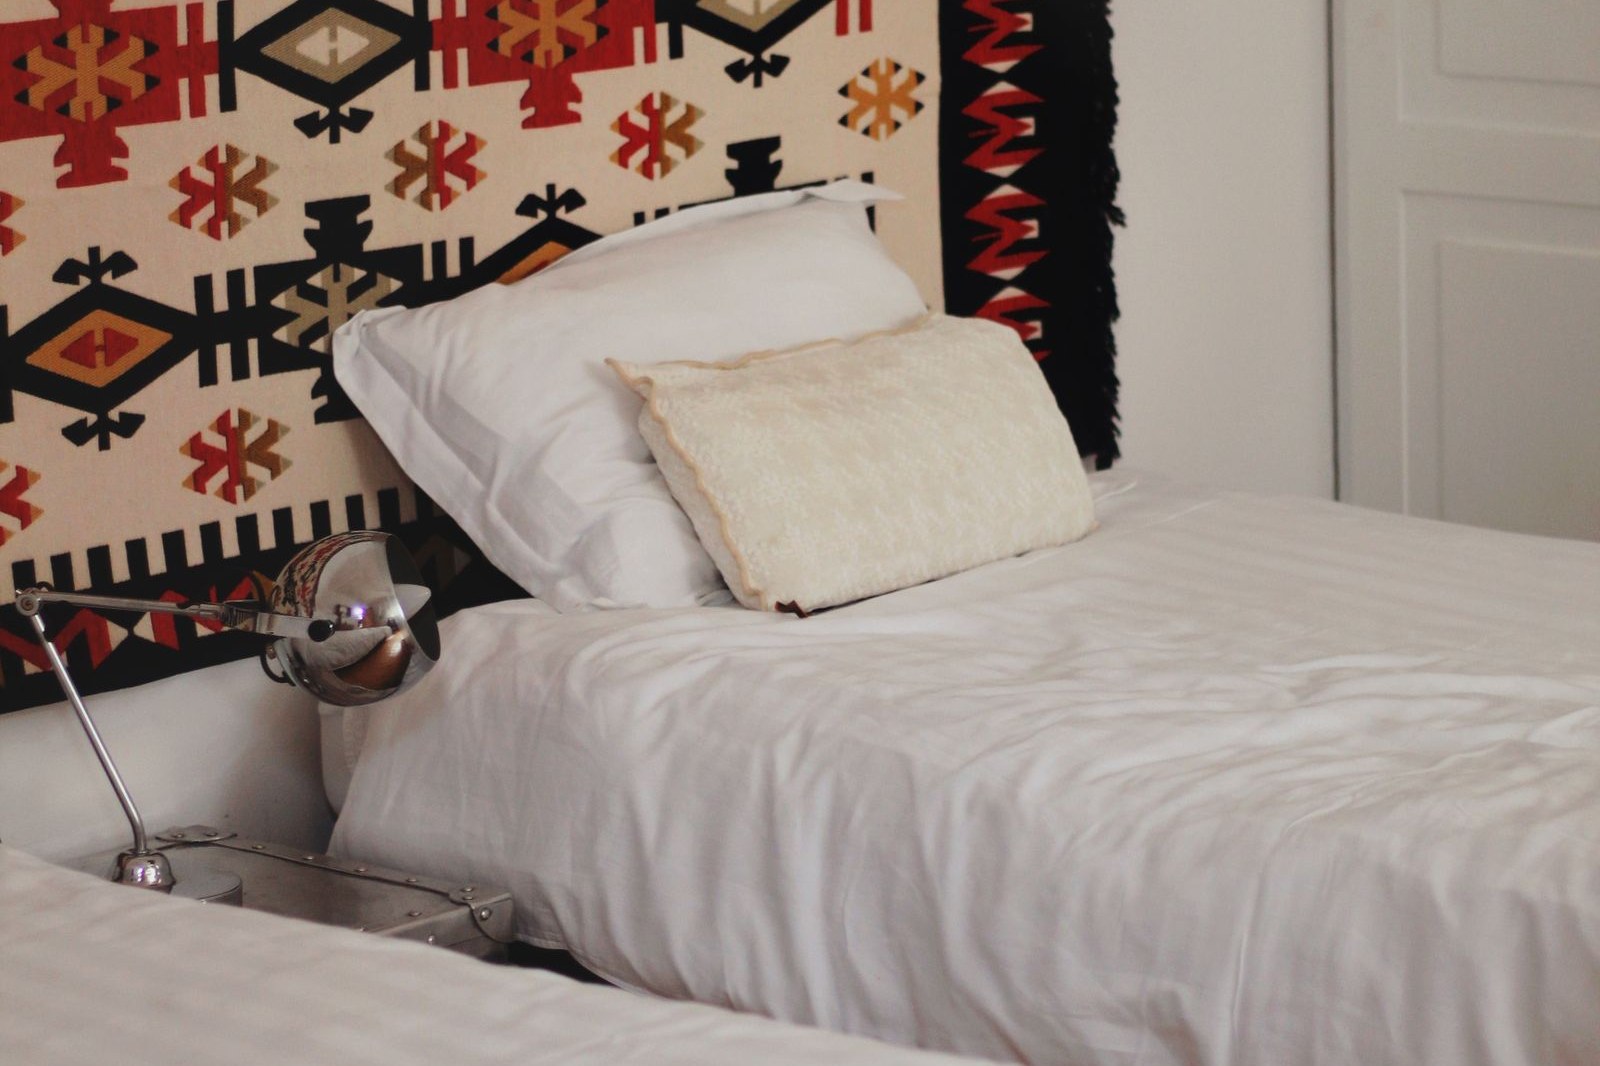
Over a bed, weight matters. A big framed picture above your pillow is a risk most of us quietly ignore. A tapestry is not.
Hang one from a wooden dowel or a slim branch, and pick a width close to the mattress width so it anchors the bed instead of floating above it like a flag. Too narrow is the classic failure here: a 40 inch hanging over a 60 inch bed looks lost. Cotton and wool tones sit easily with plain bedding, and the fabric softens the echo you get in small hard rooms, which is a quiet bonus nobody mentions.
Take it outside and shake it every month or so. Textiles over beds collect dust, and gravity delivers it to the pillows.
8. Decals Are the Fastest Fix on This List
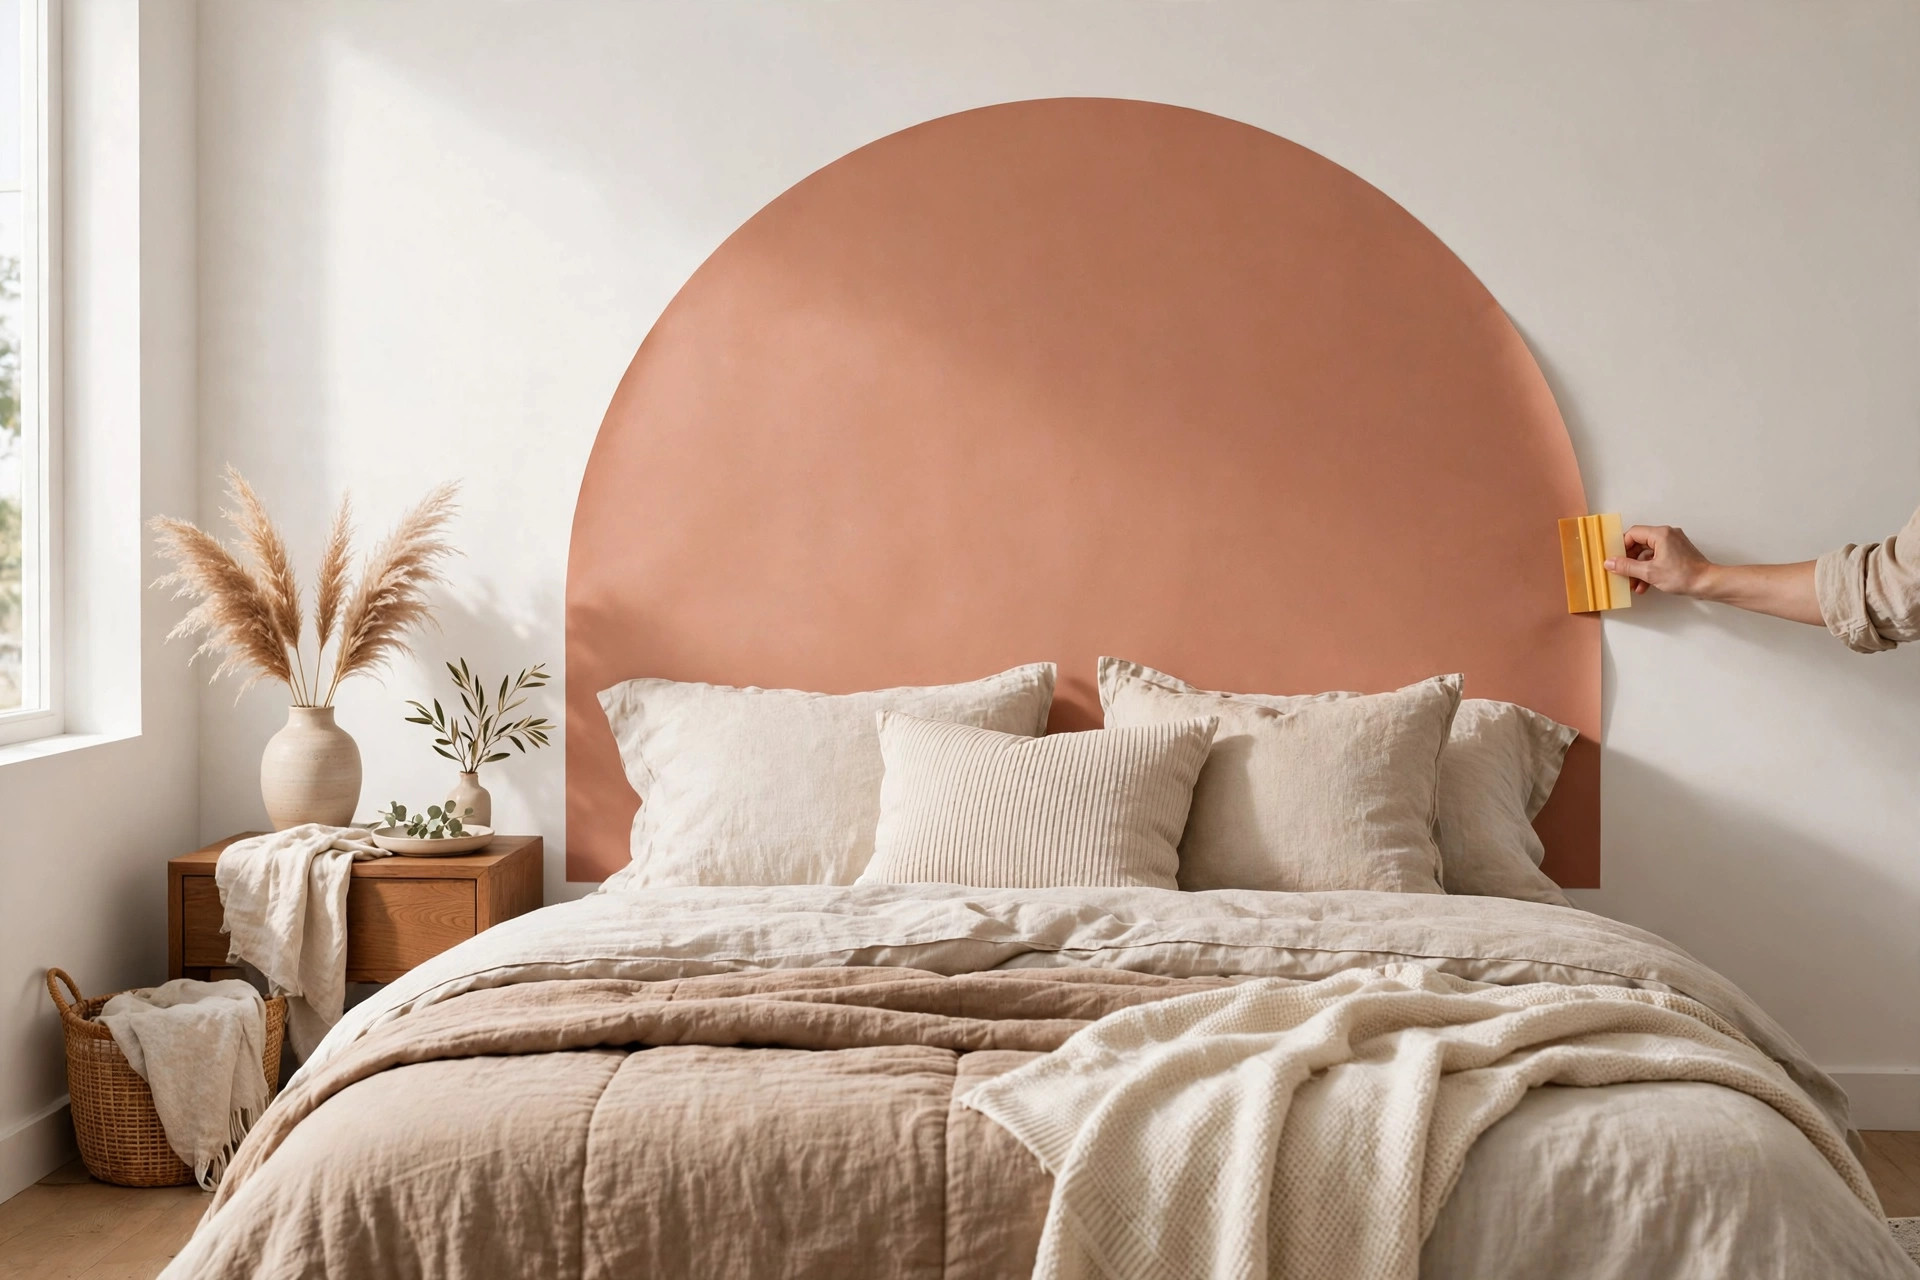
Under an hour, box to finished. A removable arched decal, a border of stems, or a full width scenic strip gives you the headboard shape with zero thickness, and it peels off when you go.
Work from the center outward and smooth as you go. Bubbles and creases are the failure mode, and in a flat design they show from across the room, so go slow on the first half and the second half behaves. Clean the wall and let it dry fully before you start, because dust under a decal never hides.
Choose matte. Shiny vinyl looks cheap under warm bedroom light and photographs terribly, which matters if this room ever needs to earn its keep in photos.
9. Lean Big Art, Then Pin the Tops Down

Two large prints leaned on a narrow picture ledge, or one oversized piece rested at the mattress line, can stand in for a headboard with real presence, and leaning means zero holes.
Overlap the pair slightly and keep the subjects calm: landscapes, abstracts, simple line drawings. Busy art over a bed fights the bedding. Frames in one finish pull the pair together, mixed finishes pull them apart.
Now the part people skip, and regret at 3 a.m. Secure the tops with removable adhesive strips. A leaning frame slides a fraction every time the bed moves, and one night it slides all the way. Thirty seconds with two strips is the whole fix.
10. Stick On Cushions for the Real Headboard Feel
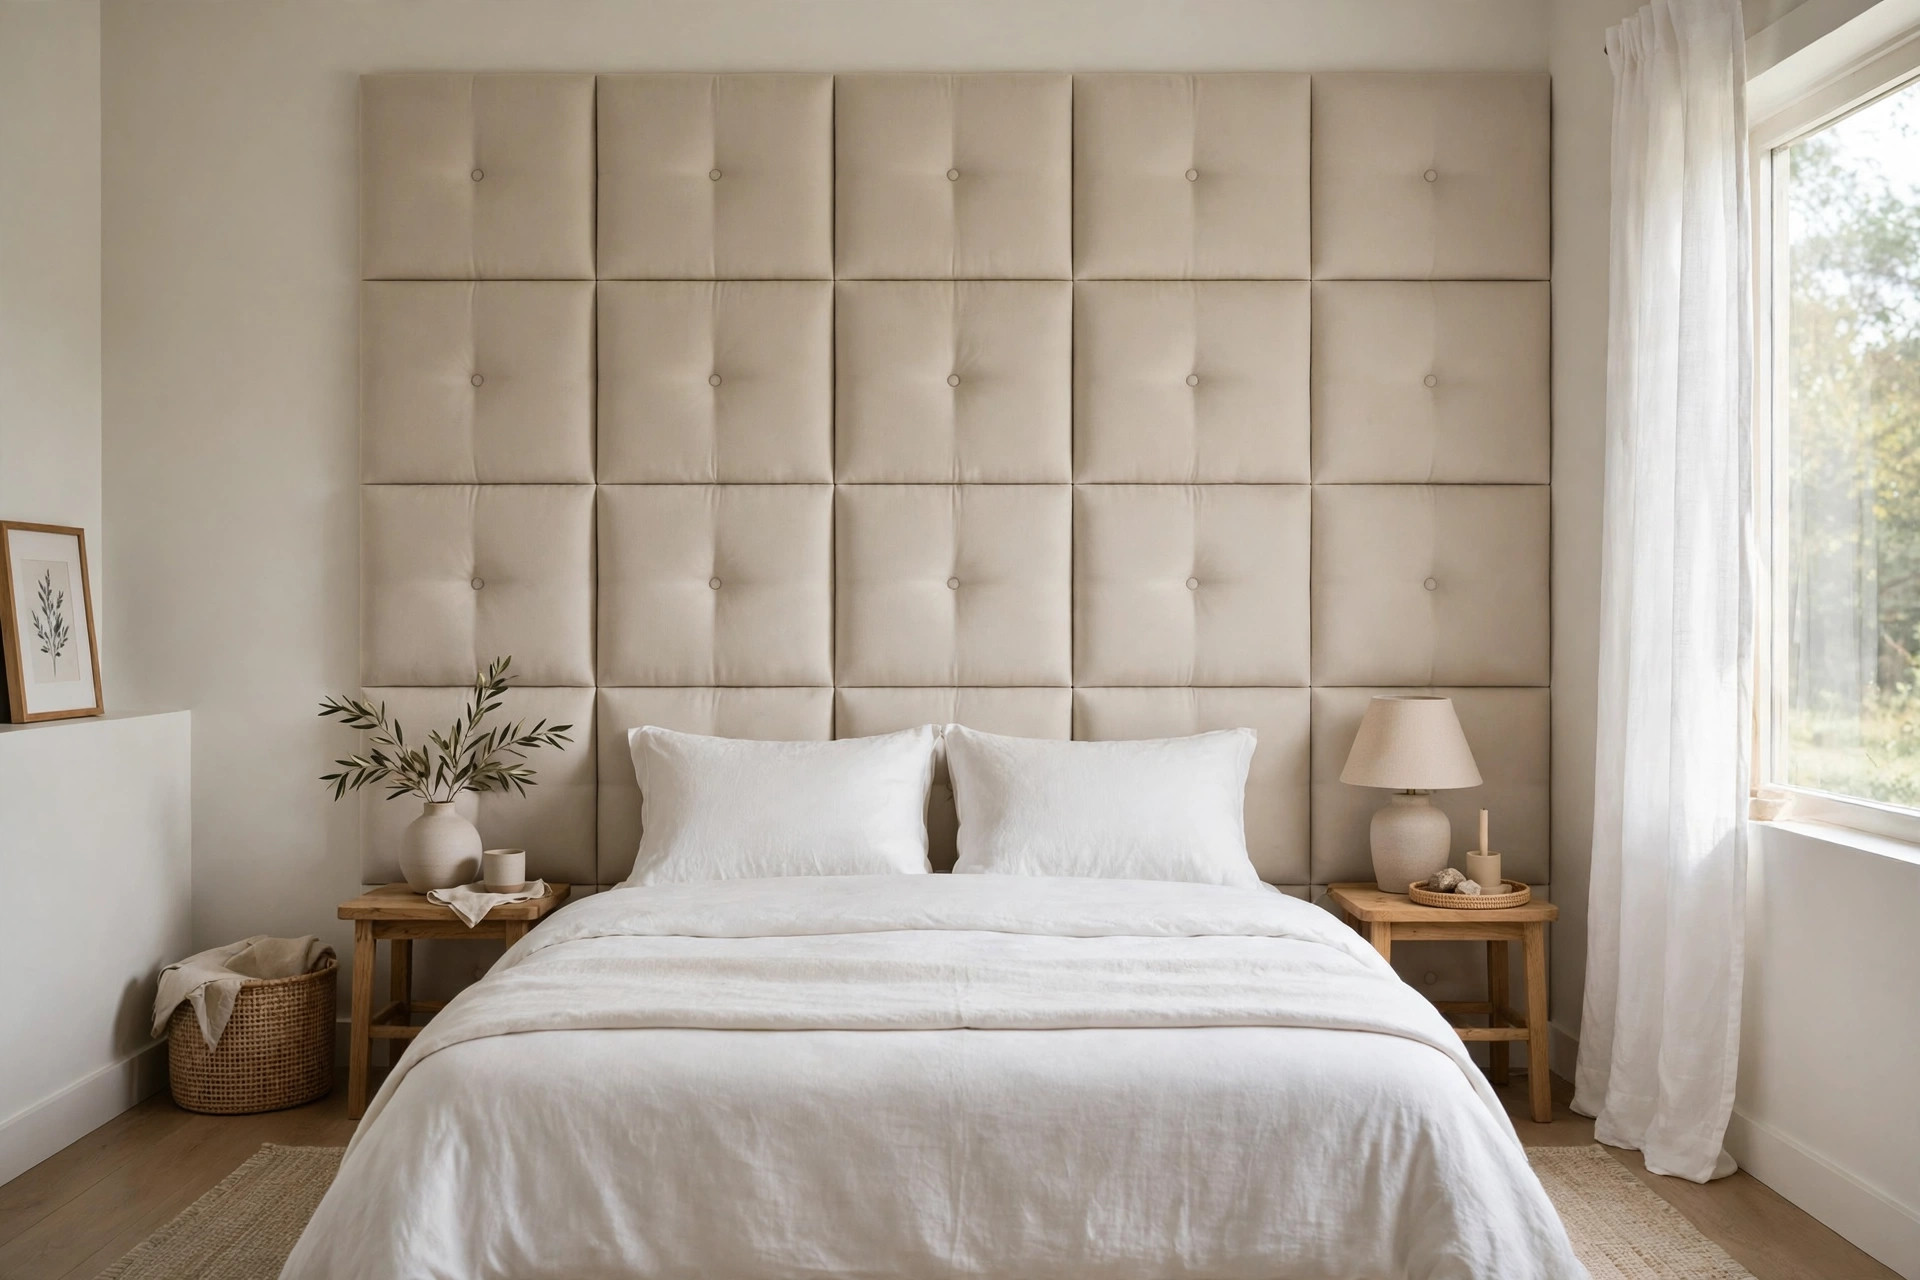
If what you miss is leaning back against something soft with a book, this is your idea. Individual padded panels with adhesive backs give you the actual comfort of an upholstered headboard, no frame, no legs, no lost floor.
Set them in a neat grid the width of the bed, two or three rows high. Velvet look fabric reads richest, linen look reads calmest. Then respect the cure time on the packet, usually 24 to 48 hours, before you lean a single pillow against them. Panels pressed into service an hour after sticking are the ones found on the bed by morning. Buy one spare panel while your design is still in stock, because a corner replacement two years from now will not match a fresh dye batch.
11. Slide a Low Bookcase Behind the Bed

Sometimes the wall treatment is furniture. Pull a low, wide bookcase a few inches out from the wall, push the bed against it, and you have a headboard with shelves built in.
The top ledge works as a nightstand for a lamp and a water glass. The shelves hold books, and in a room where the bed wall is the only wall with space, those dead inches behind the pillows stop being dead. Keep the top almost bare, though. A crowded ledge right behind your head makes the sleeping side feel busy, and sleep loses.
Anchor the case to the wall if anyone small and climb minded shares your home. A bookcase that can be pulled is a bookcase that will be.
12. Fold a Screen Behind It. Change Your Mind Anytime.
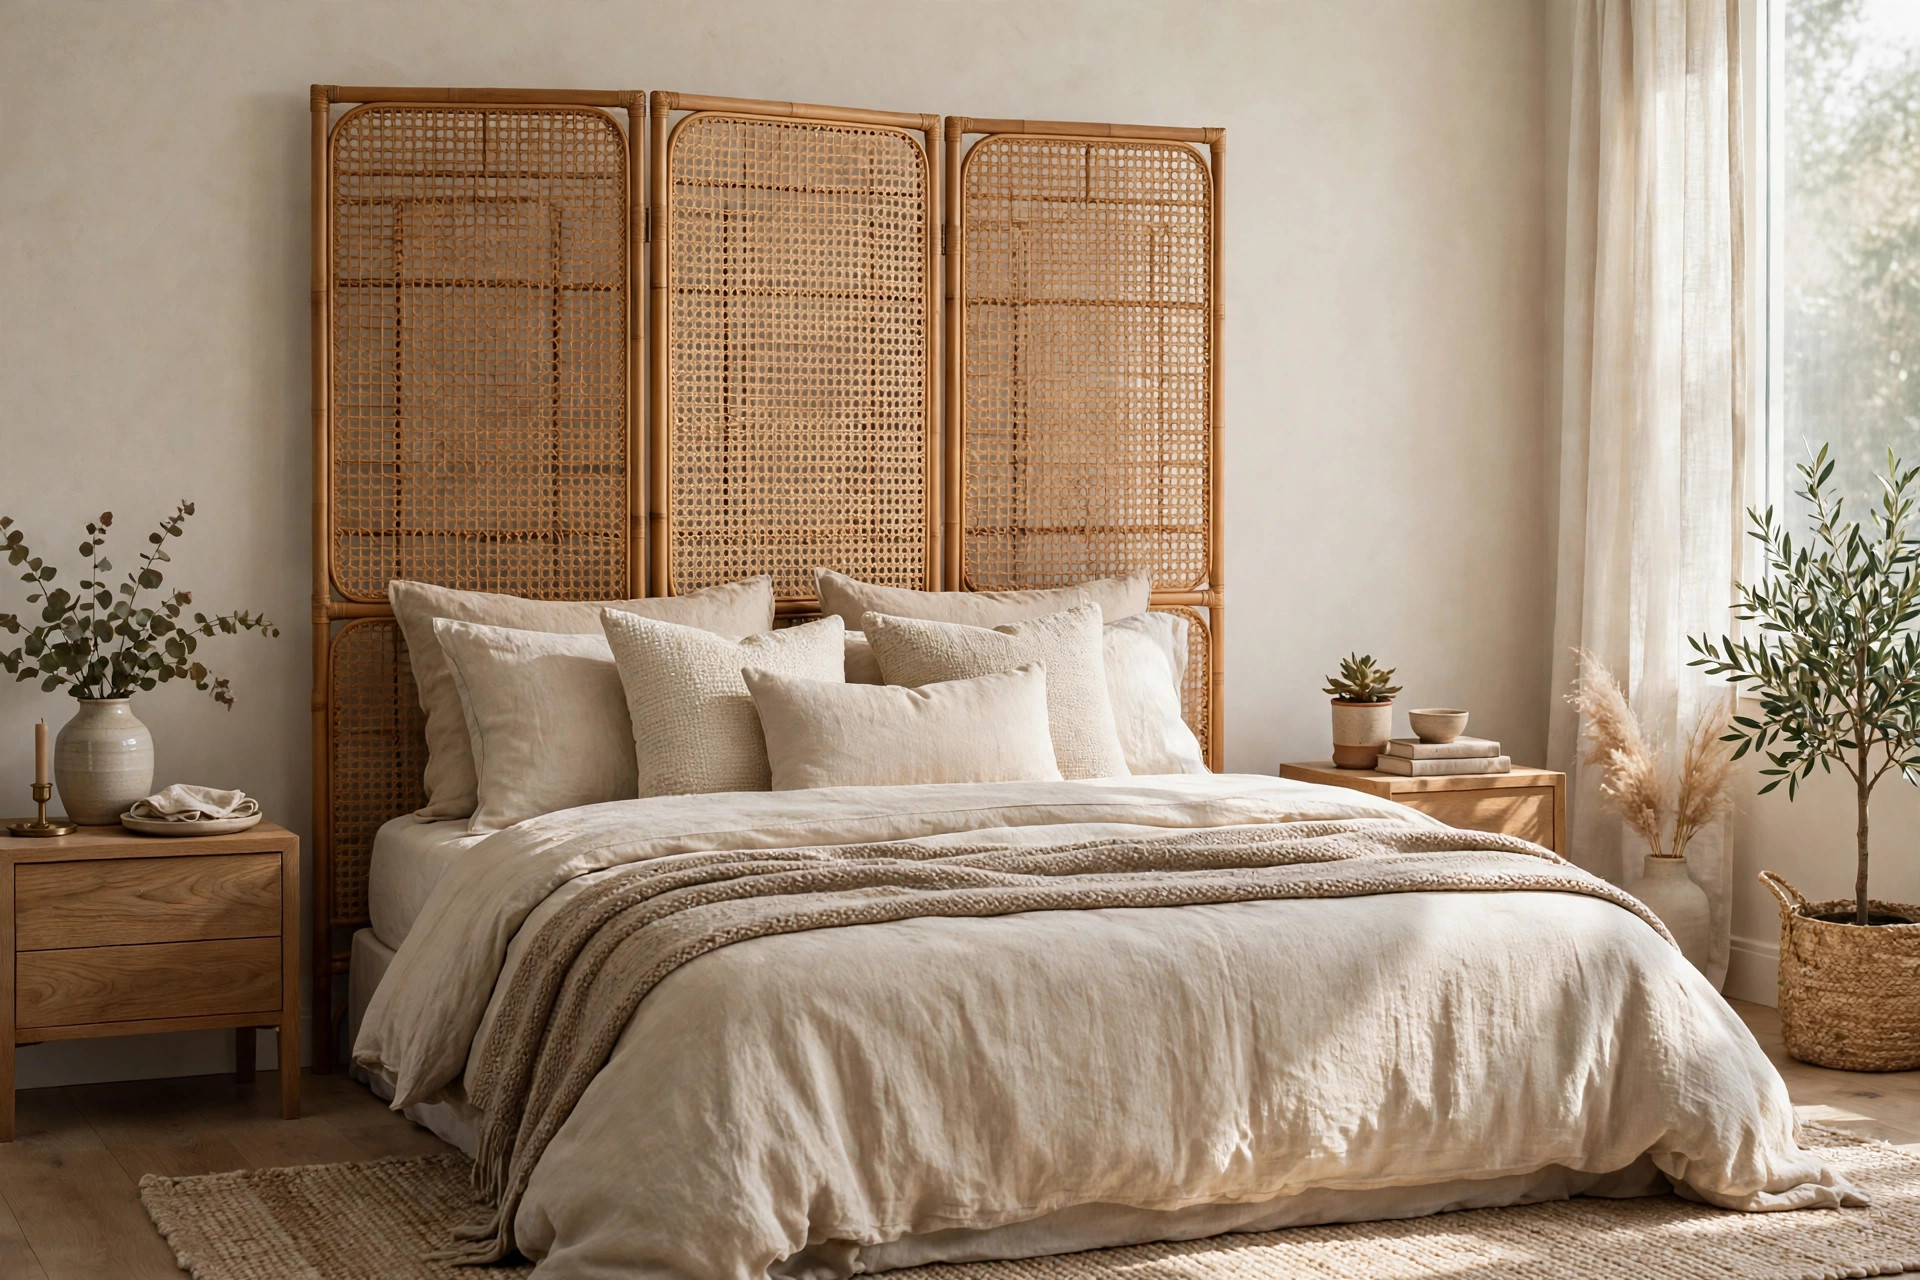
Nothing fixed, nothing stuck, nothing painted. A folding screen behind the bed gives you height and pattern in about four minutes, and it folds away the day you want the wall back.
Rattan, cane webbing and carved wood all read as real furniture rather than a substitute, and that is the trick of this idea. It must be wider than the bed, or use two panels angled slightly at the sides, because a screen narrower than the mattress looks like it wandered in from another room. Check it stands steady on your floor before you commit to the spot, since a screen that rocks on thick carpet will tap the wall every time the bed moves. For renters in strict buildings, where even adhesive is a no, this is the safest idea here.
13. Dress the Bed. That Is Half the Job.
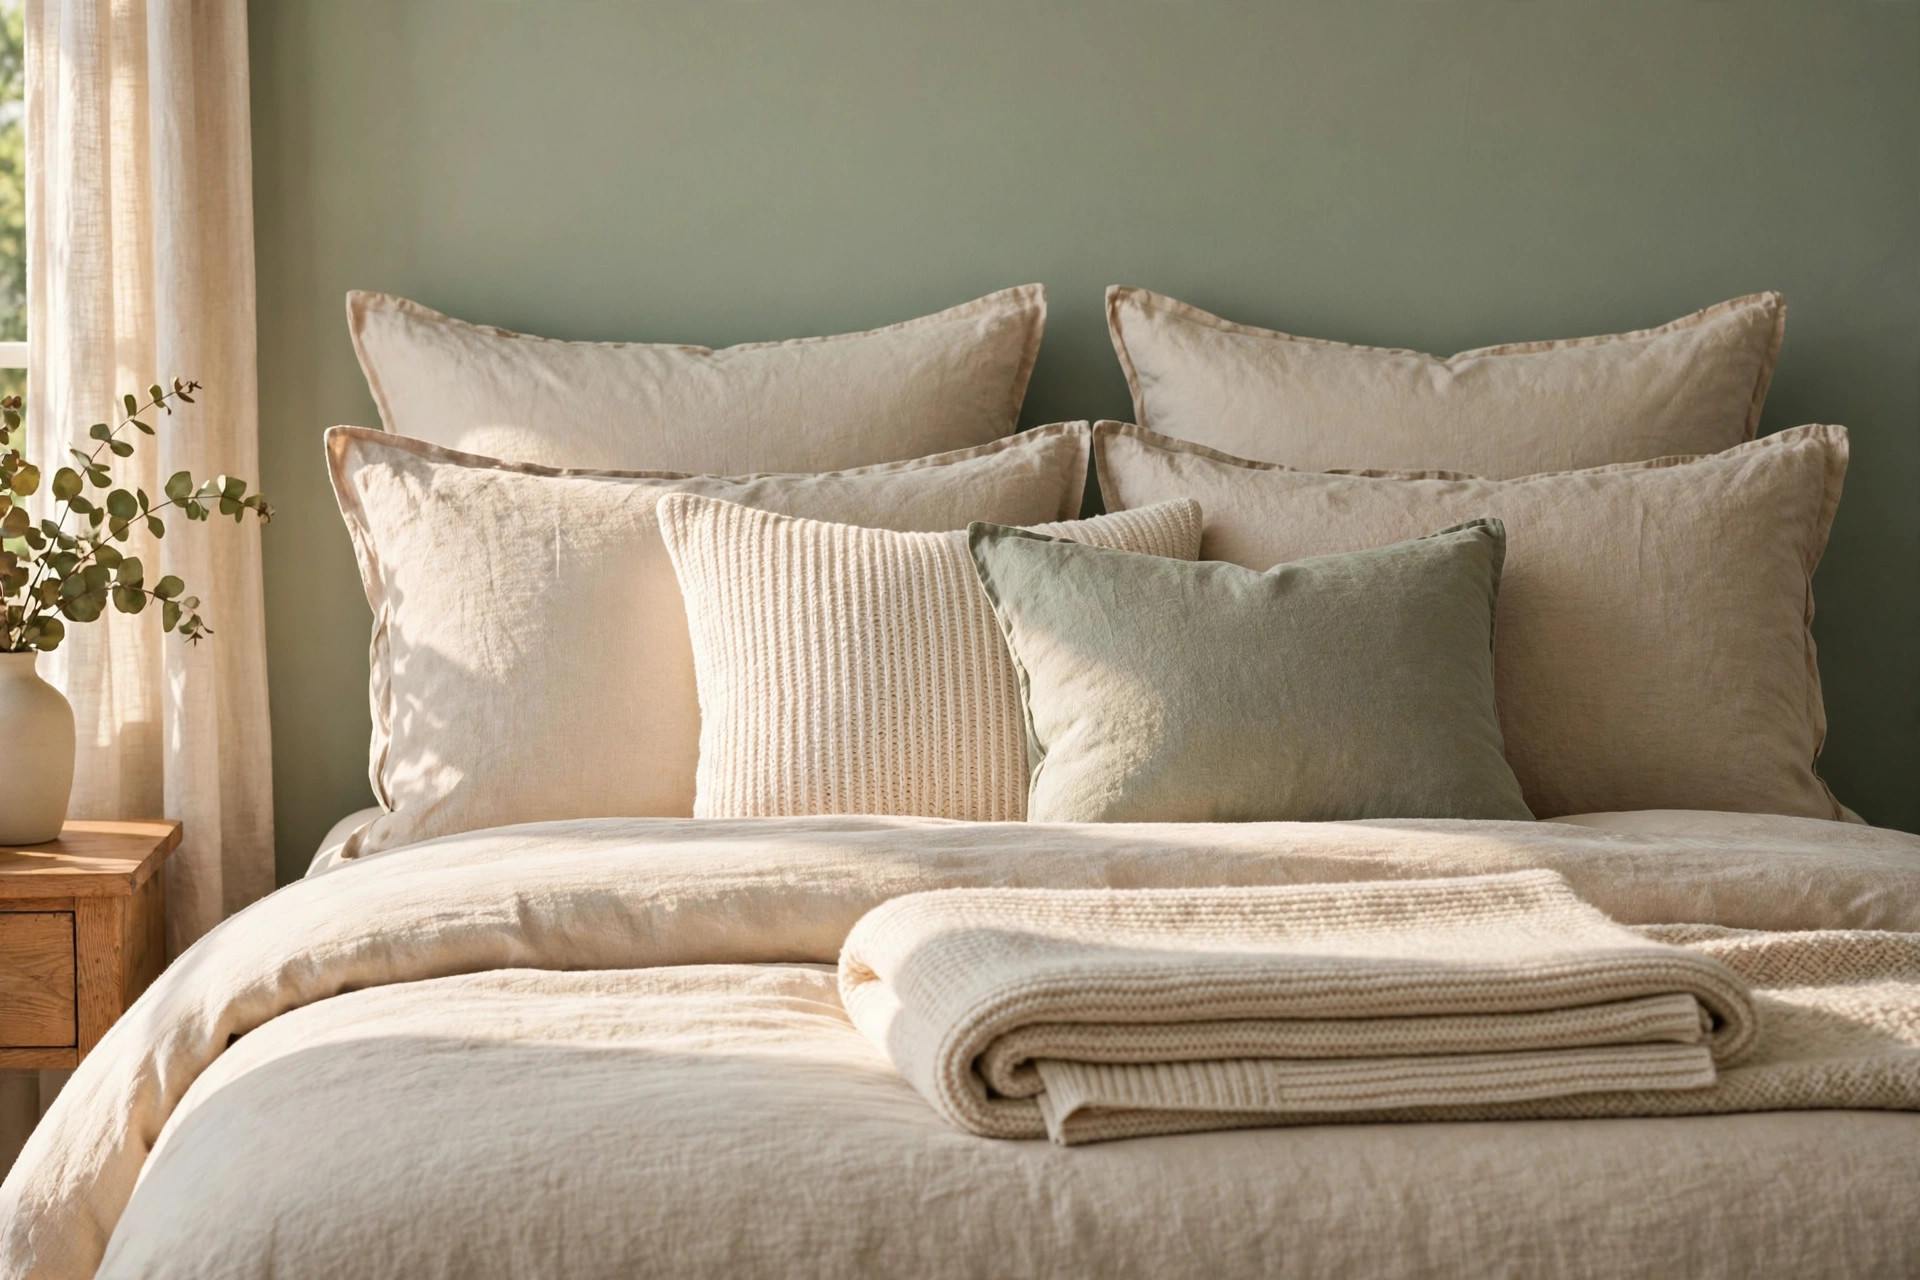
Whatever you put on the wall, the bed only reads finished when the bedding carries its half.
Stand the sleeping pillows upright against your new backdrop. Add one long lumbar cushion or two square ones in front. Fold a throw across the foot, because it widens the base of the bed visually and makes even a flat painted arch look deliberate. Learning how to layer bedding like a hotel turns any of these 13 backdrops into a complete, designed bed, and it costs nothing but ten minutes.
My finishing test is the doorway. If the bed looks intentional from the door, you are done. Stop there, before styling turns into clutter.
The Bottom Line
A small bedroom does not need a headboard. It needs one clear shape on the wall behind the pillows, and dressed bedding in front of it. Choose by your lease first: paint if you can, stick on panels or cushions if you cannot drill, a screen or leaning art if you cannot stick anything at all. Then stop adding things. A flat, calm backdrop beats a bulky frame in a small room every single time.
Start with the paint. One can, one roll of tape, one afternoon, and the bed has a focal point tonight.
Frequently Asked Questions
How do you make a bed look finished without a headboard?
Put a defined shape or texture on the wall behind the bed, an arch, a panel, a hanging or a shelf, then stand the pillows upright against it and add one cushion layer and a folded throw. The wall does the focal point job, and the dressed bedding finishes it.
What is the cheapest headboard alternative?
Paint. A painted arch or rectangle uses part of one can of paint and a roll of tape, and one coat of wall color covers it when you move. A removable decal runs a close second if you cannot paint at all.
Are painted arches behind a bed still in style?
Yes, in softer, wider shapes and muted colors, where they read as part of the room rather than a loud trend piece. Keep the arch about six inches wider than the mattress and only a couple of shades deeper than the wall, and it stays current.
Can renters use headboard alternatives without drilling?
Yes. Curtains on tension or adhesive rails, peel and stick panels and decals, stick on cushions, leaning art, folding screens and tapestries on removable hooks all go up with no holes at all. Test any adhesive in a hidden spot first, follow the weight ratings, and wait the full 24 to 48 hour cure time so removal stays clean.