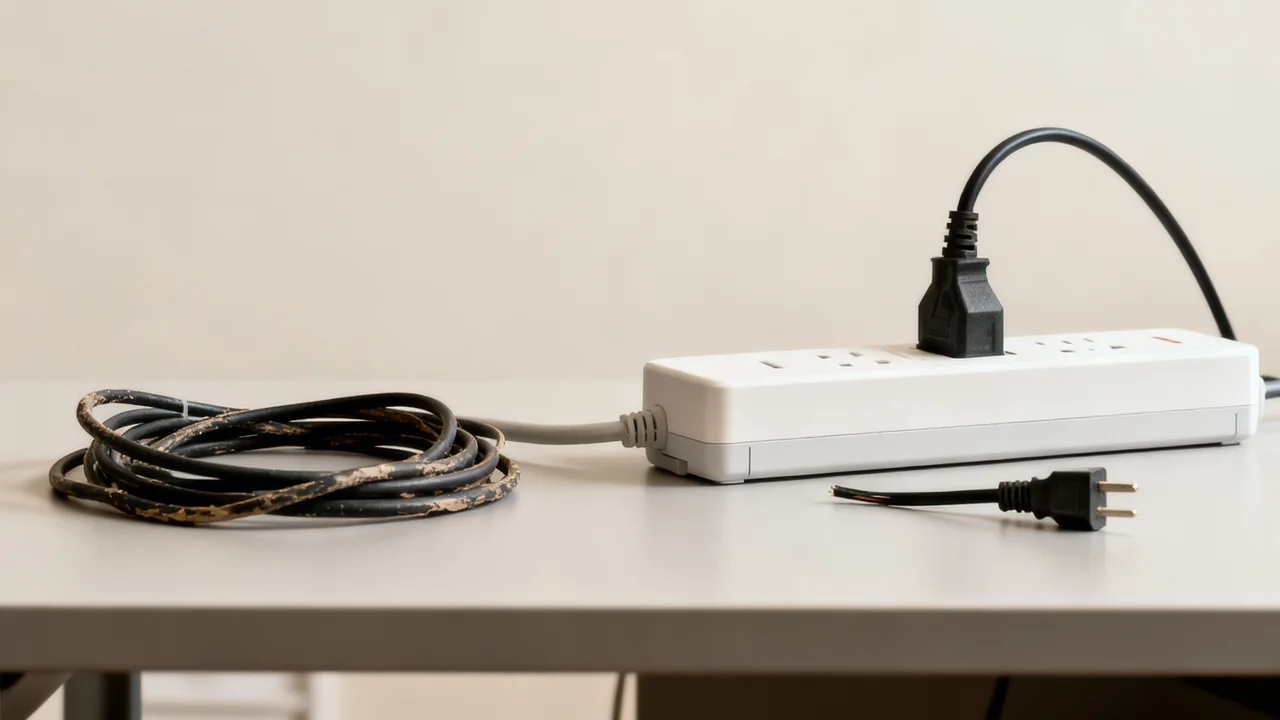
Power cord and plug damage is a common, overlooked office hazard that can cause equipment failure, electrical shocks, or fire risks, even in low-traffic workspaces. Routine observation can identify reasons to stop using equipment and request qualified assessment. It is not electrical testing or proof that a circuit is safe. Follow the workplace’s inspection arrangements and the device instructions; a monthly or quarterly walkthrough does not replace required pre-use checks.
Pre-Inspection Preparation for Safe Checks
Before starting any walkthrough, map all devices that use removable or hardwired power cords to avoid missing high-risk items. This list includes desktop computers, monitors, printers, scanners, space heaters, portable chargers, conference room AV equipment, kitchen appliances, and power strips mounted under desks or behind furniture. For shared areas, note hard-to-reach cords behind bookshelves or under meeting room tables that may be damaged by foot traffic or rolling chairs.
Do not attempt to move heavy furniture to access cords during a routine check; arrange access using the workplace’s suitable moving and handling procedure. Never yank cords from wall outlets to inspect plugs, as this can loosen internal wiring in both the cord and the outlet. Where the device, plug, outlet and surrounding area are dry and undamaged, follow the instructed shutdown procedure and unplug using the plug body, not the cord. If there is heat, damage, wetness or uncertainty, keep clear and have the authorized person isolate the supply. Turning a device off is not the same as making an electrical fault safe.
Step-by-Step Plug Inspection Checks
Start with the plug, as damage here is often easier to spot than cord wear further down the line. First, verify that the plug’s two or three prongs are straight and not bent, cracked, or chipped. Bent prongs can create loose connections that generate excess heat, even if the device appears to work normally. Never attempt to straighten bent prongs yourself, as this can weaken the metal and cause it to break off inside an outlet during future use.
Next, check the plastic housing around the base of the prongs for cracks, discoloration, or melted spots. Brown or black marks, melting or other discoloration can indicate overheating and require assessment; do not continue use merely because the equipment still works. Finally, confirm the prongs are free of rust, corrosion, or sticky residue from spilled drinks or cleaning products, which can interfere with electrical contact.
Step-by-Step Power Cord Inspection Checks
Work your way from the plug down the full length of the cord to the point where it connects to the device or power strip. First, check the strain relief, the rigid plastic section where the cord meets the plug housing, for fraying, exposed wiring, or splits. This area deserves attention because strain at a connection can damage it.
Inspect accessible cable visually without running a hand over potentially damaged insulation. Do not flex or manipulate a suspect cord to see whether a fault appears. Look for cuts, splits, scrapes or punctures in the insulation even if no conductor is visible. Crushing, sharp kinks and other deformation may damage insulation or conductors; report uncertain condition rather than flexing the cord. If routing prevents a clear view, arrange safe access rather than pulling or unwrapping live or suspect wiring.
Finally, inspect the strain relief on the device end of the cord for the same fraying or splitting you checked for on the plug end. For removable cords (such as those used for desktop monitors or printers), look for visible displacement or damage. Do not wiggle an energized connector; report any suspected poor fit for assessment.
Illustrative Example: Front Desk Workstation Check
Consider a 4-person small office conducting a quarterly walkthrough, starting with the front desk workstation. The desk holds a desktop computer, two monitors, a laser printer, a desk lamp, and a power strip mounted under the desk surface.
The manager inspects each plug first: the printer plug has a slightly bent lower prong, the right monitor plug has faint brown discoloration around the left prong, and the remaining plugs are undamaged. Moving to the cords: the desk lamp cord has a 1-inch cut in the outer insulation from a recent box cutter use near the desk, the printer cord has fraying at the plug strain relief from being repeatedly tugged to move the printer for supply refills, and the remaining cords are intact with no bumps or fraying.
In this case, the manager labels the printer, right monitor, and desk lamp as unavailable until appropriate assessment, repair or replacement, and required checks are complete, and moves a spare monitor from the storage closet to the front desk to minimize downtime. The power strip is also inspected, with no signs of damage, so it remains in use.
Remove Suspect Equipment from Use
Do not use tape, a replacement fuse, a power strip or a lower-power setting to make a damaged cord acceptable temporarily. Arrange safe isolation and mark the equipment unavailable. Staff should not open plugs, splice cables or repair hardwired cords.
| Observation | Immediate decision | Follow-up |
|---|---|---|
| Bent, missing or damaged pin | Stop use; do not straighten or modify it | Approved replacement or qualified service assessment |
| Cut, crushed or uncertain insulation | Do not tape over and continue use | Have the cord and equipment assessed |
| Damaged strain relief | Remove from use | Correct replacement or authorized repair |
| Heat, melting, burning smell or discoloration | Keep clear and arrange safe isolation | Qualified assessment of equipment and affected outlet |
| Loose or damaged outlet | Prevent use of the affected point | Authorized electrical professional |
A hardwired cord does not automatically require disposal of the whole device; an authorized repair may be available. A removable cord must match the equipment’s specified ratings and connector requirements. Use the manufacturer or service provider’s advice rather than choosing solely by whether a connector fits.
For U.S. workplaces, OSHA 1910.334 addresses visual checks and removing damaged items from service until the necessary repairs and tests have made them safe. Use the requirements applicable to your workplace and location; an informal office walkthrough is not a substitute for required inspection or testing.
Common Missteps to Avoid During Checks
Many routine check oversights stem from assumptions about visible damage. First, do not assume a new device has a damage-free cord; new equipment can have factory defects, or cords can be damaged during unboxing or setup. Check new equipment before first use in accordance with the workplace procedure, even if it is still under warranty.
Second, do not daisy-chain power strips or extension cords to avoid checking hard-to-reach cords. Unapproved daisy-chaining can overload components and creates a confusing arrangement that is harder to inspect. If a cord cannot reach safely, have facilities arrange an approved power layout; do not improvise a chain of extensions.
Third, do not ignore cords for infrequently used devices, such as conference room projectors, holiday string lights, or portable speakers for team events. These devices are often stored in closets or under shelves, where cords can be chewed by pests or crushed by stored boxes, leading to hidden damage when they are eventually plugged in. Add these devices to your inspection checklist even if they are only used once per quarter.
Documentation and Follow-Up Procedures
Track all inspection findings in a shared log to identify recurring damage patterns across your office. For each device, note the date of inspection, type of damage found, repair or replacement action taken, and date the action was completed. Take photos of damaged cords or plugs to attach to repair tickets if you use a third-party vendor for device repairs, or to submit to manufacturers for warranty claims if the damage is a factory defect.
Assign an owner to every unresolved defect and record the approved repair or replacement. Keep the item unavailable until the required assessment, repair and checks are complete. Record who cleared it for use and when; a deadline or a label alone does not make it safe.
Short Actionable Pre-Walkthrough Checklist
Before starting your next routine office check, confirm you have completed these steps to ensure a thorough, safe inspection:
- Map all cord-connected devices across workstations, shared spaces, and storage areas to avoid missing infrequently used items
- Review previous logs and confirm that unresolved defects remain out of use
- Confirm you have spare manufacturer-approved cords for common devices (monitors, printers, desk lamps) on hand to minimize downtime
- Print “Do Not Use” labels to mark damaged devices immediately after they are found
- Arrange suitable access and handling assistance for hidden equipment without improvised lifting
Finally, if you find consistent damage across multiple devices in the same area, assess the root cause to avoid repeat issues. For example, if cords under a conference room table are repeatedly crushed by rolling chairs, add cable management clips to mount cords along the table edge instead of leaving them on the floor. If plugs in a kitchen area have consistent discoloration, have a licensed electrician inspect the outlet for loose internal wiring that may be causing overheating.
Have a question or a correction?
Contact the editorial team