Budget-Friendly Bedroom Decor Hacks: Transform Your Space Without Breaking the Bank
A bedroom that feels calm, layered and expensive has very little to do with how much you spent on it. The rooms that photograph well usually share the same quiet tricks: one strong focal wall, warm layered light, a few oversized pieces instead of many small ones, and texture doing the work that costly furniture does elsewhere. Every hack in this list follows that logic. They lean on paint, tape, second hand finds and simple DIY panels, so each one can be done in a weekend with a modest budget.
Work through them in order, or pick the two or three your room is missing most.
1. Use Bold Geometric Accent Walls

A geometric accent wall is the cheapest focal point you can build. All it takes is painter’s tape, a level and leftover or sample pot paint. Mark out large triangles, arches or an offset grid on the wall behind the bed, tape the edges firmly, and paint each shape in a tone drawn from your bedding so the wall feels planned rather than random. Keep the shapes big. Small, busy patterns read as clutter in a bedroom, while two or three large blocks of color look deliberate and architectural. Peel the tape away while the paint is still slightly wet for the cleanest lines.
2. Add Sophisticated Wood Paneling

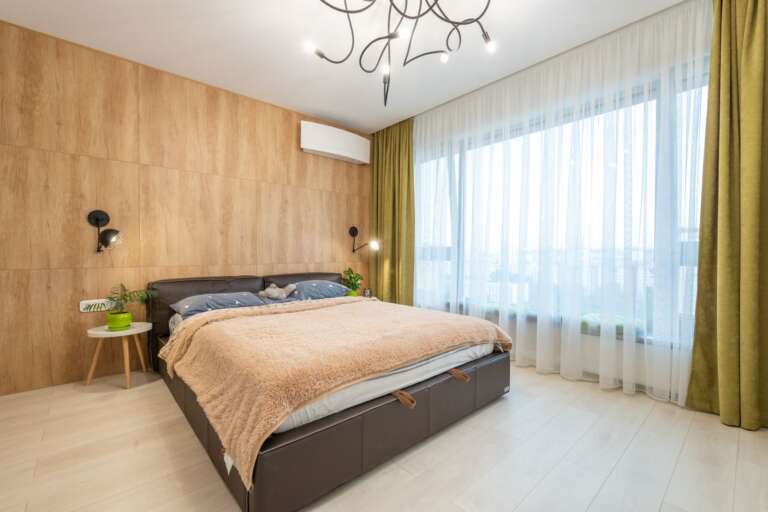
Wood paneling sounds like a renovation, but the budget version is simple. Thin plywood strips, MDF battens or reclaimed timber boards fixed vertically to one wall give you the same shadow lines and warmth for a fraction of the cost. Vertical battens also pull the eye upward, which makes a low ceiling feel taller. Space the strips evenly, roughly a hand’s width apart, and either stain them for a natural finish or paint them the same color as the wall for a subtle, expensive looking texture. Fill and sand the fixings before painting so the result reads as joinery, not craft project.
3. Hang Oversized Abstract Art Installations

One large piece of art calms a bedroom in a way that six small frames never will, and it does not have to come from a gallery. Stretch a length of linen or a patterned fabric remnant over a simple wooden frame, or paint your own abstract canvas with two or three leftover wall colors and a wide brush. Loose strokes and plenty of breathing room look more convincing than tight detail. Hang the piece so its center sits just above the headboard, close enough to feel connected to the bed. Scale is the whole trick here, so go bigger than feels safe.
4. Layer with Textured Wallpaper and Grasscloth

Grasscloth brings a woven, natural texture that flat paint cannot copy, and peel and stick versions have made it a renter friendly, low commitment option. Use it on the headboard wall only, where it works hardest and one roll goes a long way. The texture catches morning and evening light differently through the day, so the room feels alive without extra decor. Pair it with plain bedding in a similar tonal family and let the wall be the pattern. If real grasscloth is beyond budget, look for vinyl textured papers that imitate the weave. From a normal viewing distance, guests will not know the difference.
5. Install Floating Shelves with Curated Decor

Floating shelves give a small bedroom display space without taking up any floor. A length of oak or pine board on hidden brackets can hold the things a bedside table cannot: a small stack of books, a ceramic vase, a candle and one framed print leaned against the wall. The discipline is in the editing. Group objects in threes, mix one tall piece with one low and one round, and leave empty space between groups so the shelf reads as styled rather than stored. Fit the shelf where it solves a problem, above a dresser, beside the bed, or along a wasted stretch of wall.
6. Create Depth with Arched Wall Niches

Arches soften a boxy bedroom instantly, and the painted version costs almost nothing. Mark an arch shape on the wall with string and a pencil, then paint inside it one or two shades deeper than the wall color. The eye reads the darker shape as a recess, so the wall gains depth it does not have. Style the arch the way you would a real niche: a small shelf at its base, a single sculptural vase, or a trailing plant on a hook. Painted arches work especially well behind a bedside table or a reading chair, where they frame the furniture like a backdrop.
7. Experiment with Moody Monochrome Paint

Painting a room in one deep shade, walls, trim and even the ceiling, is called color drenching, and it turns a plain bedroom into a cocoon. Deep charcoal, ink navy and forest green all work, and because everything shares one color, mismatched furniture and old trim suddenly look intentional. The fear that dark paint shrinks a room rarely holds in a bedroom, where cozy is the goal. Balance the depth with pale bedding, a light rug and warm lamp light so the contrast does the decorating. One large tin covers most bedrooms, which keeps this among the cheapest full room transformations you can do.
8. Incorporate Metallic Inlays and Luxury Trim

Thin metallic strips are a small detail with an outsized effect. Self adhesive brass or gold look trim, pressed into the seams of a paneled wall or run along the edge of a painted arch, catches lamplight and gives plain DIY paneling a finished, tailored feel. A little goes a long way. One metallic line per wall is elegant; five becomes glitzy. Match the tone to the metal already in the room, on your lamp bases, handles or frames, so it feels like part of a scheme. This is also a forgiving upgrade, since the strips peel off cleanly if you change your mind.
9. Maximize Space with Large-Scale Mirror Walls

Mirrors earn their keep in a small or dark bedroom by borrowing light and view from the rest of the room. A group of large mirror tiles, a single oversized leaning mirror, or mirrored wardrobe doors all do the same job. Place the mirror so it reflects a window or a lamp rather than a cluttered corner, because whatever it reflects is what doubles. An offset or staggered layout feels modern and hides imperfect walls. Keep frames slim and matching so the wall reads as one feature. Clean lines matter more than ornament here, and second hand mirrors are easy to find and simple to repaint.
10. Refresh with Living Green Walls

A green wall does not need a built in irrigation system to feel lush. Start with wall mounted planters, a picture ledge of small pots, or hooks for hanging plants at staggered heights in your brightest corner. Trailing pothos, ferns and ivy grow fast, cost little and forgive beginners. Grouping the plants in one zone makes the display feel like a feature rather than scattered clutter, and it keeps watering in one place. Keep pots in a limited palette so the greenery is the color. If your room is low light, rotate plants to a bright windowsill weekly, or mix in a few good faux stems.
11. Balance with Symmetrical Sconces

Matching sconces on either side of the bed give a bedroom the balanced, settled feeling of a good hotel room, and they free up the bedside tables completely. Plug in and battery sconces have removed the electrician from this job, so the upgrade is now an afternoon of measuring and drilling. Hang them at roughly shoulder height when you are sitting up in bed, close enough to read by without glare. Symmetry does quiet psychological work here. It makes the bed feel like the planned center of the room, and once the lighting is balanced, the rest of the decor can stay simple.
Conclusion
None of these hacks asks for a big budget, a landlord’s permission slip for major work, or a designer on call. They ask for paint, patience and a willingness to edit. Start with the focal wall your room is missing, fix the lighting balance, and add texture before you add objects. Do those three things and the bedroom will already feel transformed. Then work through the rest of the list as time and money allow, one weekend at a time. A room built slowly from smart, cheap changes almost always ends up more personal than one bought in a single expensive order.
Renters working with zero built ins will also love these no closet storage ideas, which build a full wardrobe system from rails, shelves and baskets.
Also worth a look: boho bedroom on a budget.
Frequently Asked Questions
What is the cheapest bedroom upgrade that makes the biggest difference?
Paint, used well. A geometric accent wall or a full color drench changes every surface the eye lands on, and it costs one or two tins of paint plus tape. Lighting balance comes second, because a pair of sconces or well placed lamps changes how the whole room feels after dark.
How can I make a small bedroom look bigger without spending much?
Borrow light and keep sight lines long. A large mirror placed to reflect a window, vertical paneling that pulls the eye up, and floating shelves instead of bulky furniture all add visual space. A calm, limited color palette stops the room breaking into small, busy pieces.
Are these hacks suitable for a rented bedroom?
Most of them are. Peel and stick grasscloth, plug in sconces, painted furniture, mirrors and green walls all come out or come with you. Painted walls and arches depend on your lease, so check before you open a tin, and keep the original paint color noted for moving out.
In what order should I tackle these hacks?
Start with the wall treatment, since paint and paneling are messy and define everything else. Then set the lighting, then the large pieces like art and mirrors, and finish with shelves, trim and plants. Working in that order means each layer supports the next instead of competing with it.