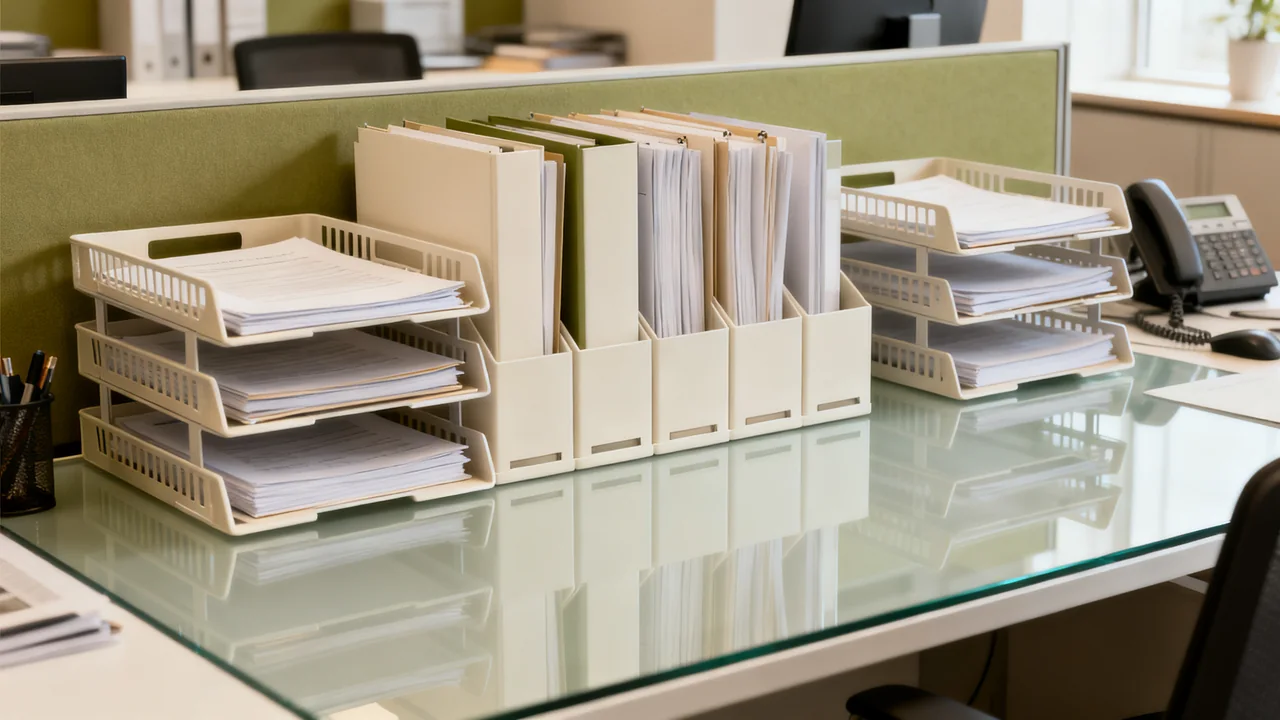
Shared admin desks serve as the central hub for incoming mail, outgoing deliveries, pending approval requests, employee onboarding paperwork, and sensitive documents that require immediate processing. Unlike personal desk trays, which only need to suit one user’s workflow, shared trays must accommodate multiple team members’ needs, reduce misfiling, and stand up to constant daily use without showing wear quickly. A clear arrangement can make handoffs easier. Open trays do not provide confidentiality; route sensitive papers through the organization’s approved restricted handling process.
First: Map Your Admin Desk Document Workflow
Before you browse tray styles, spend one to three full workdays tracking the types of documents that pass through the shared admin desk to avoid buying trays that don’t match your actual volume. Note how many distinct categories of paperwork you regularly handle, and which require open visibility versus restricted access. Common categories for most small workplaces include: unopened incoming mail, opened mail requiring routing, outgoing priority mail, outgoing standard mail, pending expense reports, pending time-off requests, new hire paperwork awaiting processing, and documents waiting to be scanned.
Measure the actual desk footprint and vertical clearance, including room to insert and remove papers from every tray. Leave shared equipment and work areas accessible. Check the largest forms or envelopes you handle against the tray’s usable internal dimensions, not only its advertised paper-size label.
Evaluate Tray Material Durability for Shared Use
Compare the finished product rather than ranking materials absolutely. Plastic, wood-based, and metal trays all vary in thickness, construction, finish, and load capacity. Inspect joints, feet, edges, and stacking connections, and check how the proposed tray behaves with a realistic paper stack.
- Plastic: Often lightweight and available in several colors. Check rigidity and any load restrictions.
- Wood-based: Can suit a reception setting, but confirm the finish, edge construction, and cleaning instructions.
- Metal: Can offer a rigid frame, but check for sharp edges, finish damage, and stability. Remove a damaged tray from service rather than improvising a repair.
Use the maker’s cleaning instructions for the actual product. A disinfectant compatible with one finish may damage another.
Stacked vs. Side-by-Side vs. Tiered Angled Trays
- Stacked: Saves desk footprint, but lower openings can be harder to see and reach. Use a compatible stacking system within its stated limits and check access to the bottom tray when the stack is loaded.
- Side by side: Makes labels and contents easy to compare, but uses more horizontal space. Measure the full arrangement, including hand clearance.
- Angled or stepped: May improve visibility in a compact area. Check the retaining lip and usable capacity; the shape alone does not establish how many pages it will hold.
Illustrative Example: Tray Selection for a 12-Person Nonprofit Admin Desk
In a hypothetical small nonprofit, three administrators share incoming mail, outgoing mail, and documents awaiting scanning. They first separate confidential personnel paperwork into the organization’s approved restricted storage, rather than leaving it in an open shared tray.
The team measures the desk and trials a compact three-tray unit with actual envelopes and forms. Labels describe the next action: “Route incoming mail,” “Ready for collection,” and “To scan.” Each category has an owner and an agreed handling routine. A tray is a temporary work queue, not a substitute for the records system.
After using the arrangement, the administrators check whether papers are easy to retrieve and whether any category repeatedly overflows. This example provides a workflow to try; it does not claim measured improvements in misfiling.
Tray Feature Comparison for Shared Use Cases
The table below outlines key features and their ideal use cases to help you narrow down options based on your team’s specific needs:
| Feature | Best for workplaces where: | Tradeoffs to consider |
|---|---|---|
| Open front design | Multiple staff access the same trays throughout the day, and quick paper insertion is a priority | Papers can slide out if the tray is bumped or overloaded; not suitable for sensitive documents |
| Label slot for custom inserts | Your document categories change regularly, or you have staff who speak multiple languages | Paper labels can get wet or smudged; you will need to print replacement inserts periodically |
| Locking lid | You handle sensitive documents like payroll checks, medical forms, or confidential personnel files | Adds cost; users need to keep track of keys or combination codes to access contents |
| Rubber non-slip base | The desk is in a high-traffic area where trays are frequently bumped by passersby | The rubber may trap dust or sticky residue over time, requiring more frequent cleaning |
| Modular stacking design | You expect to add more document categories as your team grows in the next 12 months | Check the maker’s stacking, connection, and load limits; confirm stability and access with the intended configuration |
Accessibility and Consistency Considerations for Shared Users
Since multiple team members will use the trays, you need to ensure the layout works for everyone who regularly accesses the admin desk, including staff with mobility differences or visual impairments. Place frequently used trays where the actual users can reach them comfortably without disturbing neighboring equipment. Avoid labeling trays with small, handwritten text; use clear printed labels in a size users can read from their working position, and add color coding if your team finds it helpful. Test the label visibility from a standing position and a seated position to ensure no categories are hidden from view.
Create a one-page quick reference guide taped to the side of the desk or the underside of the upper cabinet that outlines what belongs in each tray, so temporary staff or new hires can use the system correctly without asking for clarification. If your team shifts document categories seasonally, for example during tax season or open enrollment for benefits, schedule a 10-minute huddle to update the tray labels and walk all staff through the changes before they go into effect.
Post-Purchase Adjustments to Improve Long-Term Use
Once you have set up the new trays, observe how the team uses them for the first two weeks to identify any unforeseen issues. If a particular tray is consistently overloaded, add a second tray for that category, or split the category into two smaller subcategories, for example split outgoing mail into priority and standard. If users consistently misfile documents in the wrong tray, adjust the label wording or move the tray to a more visible position, instead of assuming users are making a mistake. For example, if staff keep putting expense reports in the pending approval tray, move the expense report tray to the front row and add a brightly colored border to the label to make it stand out.
Schedule a quick check-in during your regular team meeting every three months to ask if the tray system is still working for all users. As your team grows or your workflow changes, you may need to add or remove trays, adjust the layout, or switch to a more durable material to keep up with increased use. Always refer to the manufacturer’s cleaning instructions when wiping down trays, to avoid damaging the material or removing printed labels.
Have a question or a correction?
Contact the editorial team